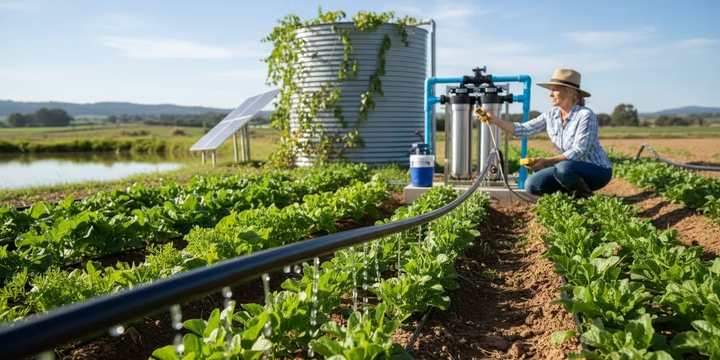
Setting up a drip irrigation system is one of the smartest ways to keep a garden thriving while saving water. The most critical component is choosing the right water source for drip irrigation. For most homeowners, filtered municipal water is the best option due to its reliability and cleanliness, but well water and harvested rainwater are also excellent choices with the right equipment. Understanding where your water comes from, how much is available, and what’s in it will make the difference between a flourishing garden and a frustrating maintenance headache.
If you’re weighing drip against traditional sprinklers, our drip vs. sprinkler comparison breaks down the costs and efficiency of each approach.
Everything below covers the journey water takes from its source to your plants, including how to test it, size your system, store it, and budget for it.
Understanding Your Water Source Availability
First things first: you need to know the limits of your supply. Water source availability isn’t just about whether water comes out when you turn the handle. It’s about quantity, reliability, and any rules that govern its use.
- Municipal Water: For most homeowners, the city provides the primary water source for drip irrigation. While convenient, it has limitations. Many cities, especially in dry regions like West Texas, have watering schedules that restrict when you can irrigate. Check the best times to water in Lubbock for current rules and tips. Pressure can also fluctuate, dropping during peak morning hours when everyone waters at once. Your home’s water meter sets a hard cap on flow, typically delivering around 10 to 15 gallons per minute (GPM) for a standard residence.
- Well Water: If you use a private well, your availability depends on the well’s yield and your pump’s capacity. Some wells only produce a few gallons per minute, which means you must design your system with smaller zones that don’t overwhelm the pump or run the well dry.
- Rainwater or Other Sources: Using collected rainwater is an excellent, sustainable option. However, its availability is entirely dependent on the weather. A 500 gallon tank might seem like a lot, but it can be depleted quickly in a dry spell. Any non potable water source for drip irrigation, like pond or well water, also introduces the need for thorough filtration.
Connecting and Measuring at the Faucet
For many DIY drip systems, everything starts at the outdoor faucet, or spigot. This simple connection point is your gateway, and a few key components and measurements are essential.
The Hose Spigot Connection
A hose spigot connection (often called a hose bibb) is the outdoor faucet where you attach your garden hose. In the United States, these feature a standard thread called Garden Hose Thread (GHT), which is a 3/4 inch diameter with 11.5 threads per inch. This standardization ensures that timers, hoses, and splitters all fit universally. It’s the most common and accessible water source for drip irrigation in a residential setting.
How to Measure Your Flow Rate
Before buying any parts, you must know your spigot’s flow rate, measured in Gallons Per Minute (GPM). This dictates how many emitters you can run at once. You can find this with a simple “bucket test”:
- Grab a container with a known volume, like a 5 gallon bucket.
- Turn the spigot on all the way and time how many seconds it takes to fill the bucket.
- Use this formula: (Bucket Size in Gallons / Seconds to Fill) x 60 = GPM.
For example, if a 5 gallon bucket fills in 50 seconds, your flow rate is (5 / 50) x 60 = 6 GPM. This number is your “water budget” for any single zone. If your measured flow seems low, a pressure troubleshooting guide can help pinpoint the issue.
Using a Y Connector for Convenience
A Y connector, or hose splitter, is a device that turns one spigot into two. It’s perfect for keeping a drip system timer attached to one outlet while leaving the other free for a regular hose. Each side usually has its own shutoff valve. Just remember, a Y connector splits the available water; it doesn’t create more. If you open both valves, the total GPM from your bucket test is shared between them.
Irrigation Water Demand Estimation for System Sizing
Knowing your flow rate is only half the equation. You also need to estimate how much water your plants actually require. Without this step, you’ll either oversize your system (wasting money and water) or undersize it (leaving plants thirsty).
Calculating Plant Water Needs
The basic approach starts with evapotranspiration (ET), which is the amount of water lost from the soil and plants through evaporation and transpiration each day. In Lubbock and West Texas, peak summer ET rates typically reach 0.25 to 0.35 inches per day, depending on temperature and wind. The Texas A&M AgriLife Extension publishes daily ET data for West Texas, and it’s a reliable baseline.
Here’s a simplified way to estimate demand for a drip zone:
- Determine the irrigated area in square feet.
- Multiply by the daily ET rate to get gallons needed. One inch of water over one square foot equals about 0.623 gallons.
- Factor in a crop coefficient. Vegetable gardens typically use a coefficient around 0.8 to 1.0, while established shrubs and trees might be 0.5 to 0.7.
For a 200 square foot vegetable bed at peak summer ET of 0.30 inches per day: 200 x 0.30 x 0.623 x 1.0 = roughly 37 gallons per day.
Matching Demand to Emitter Count and Zone Size
Once you know the daily demand, divide it by the output of your chosen emitters. If you’re using 1 GPH (gallon per hour) emitters spaced 12 inches apart, 37 emitters running for one hour would deliver 37 gallons. But you can’t run more emitters than your flow rate supports. At 6 GPM from your bucket test, that’s 360 GPH. So 37 emitters at 1 GPH each is well within budget for a single zone.
For larger properties or planning a full system, this math becomes critical for splitting the landscape into properly sized zones.
Key Components for System Protection and Performance
Once you’ve connected to your water source for drip irrigation, a few devices are non negotiable for protecting your plumbing, your health, and the irrigation equipment itself.
The Critical Role of a Backflow Preventer
A backflow preventer (often an RPZ backflow preventer) is a safety valve that ensures water only flows one way: out of your house and into your irrigation system. It stops potentially contaminated water carrying fertilizers, soil bacteria, or pesticides from being siphoned back into your home’s clean drinking supply during a pressure change. A review of incidents found 459 cases over 30 years caused over 12,000 illnesses in the U.S. This is why plumbing codes mandate backflow preventers on all irrigation systems.
If your system is connected to your main water line, a professional can ensure the right device is installed and properly tested. Learn what backflow testing involves and why it matters.
Taming Water with a Pressure Regulator
City water pressure is often between 40 to 80 PSI, which is far too high for drip irrigation. Drip systems perform best at low pressures, typically between 15 to 30 PSI. A pressure regulator is a small valve that reduces high incoming pressure to a steady, lower level. Without one, you risk bursting tubing, popping emitters off the line, and creating a fine, wasteful mist instead of efficient drips.
Why Pressure Compensating Emitters Are Worth It
A pressure compensating (PC) emitter is an advanced type of dripper that delivers a uniform amount of water regardless of pressure fluctuations. Whether it’s the first or last emitter on a long line, or on a sloped garden bed, a 1 GPH PC emitter will release 1 gallon per hour. This technology uses an internal diaphragm that self regulates, ensuring every single plant gets the same amount of water for consistent, healthy growth.
What’s In Your Water? Quality and Filtration
The quality of your water source for drip irrigation directly impacts the health of your plants and the lifespan of your equipment.
Water Quality (Minerals)
Dissolved minerals you can’t see can cause major issues over time.
- Hard Water: High in calcium and magnesium, hard water is common in over 85% of U.S. homes, including here in West Texas. It leaves behind chalky white scale that can clog emitter openings.
- Iron and Manganese: Often found in well water, these minerals cause rusty orange or black stains on sidewalks, fences, and walls. They can also feed iron bacteria, which create a slimy gunk that clogs everything.
- Salinity (Salts): Water with high salt content (Total Dissolved Solids) can build up in the soil, stunting or even killing plants.
If you suspect issues with your water, a professional water quality test can provide clear answers. The team at M&M Sprinklers often helps homeowners diagnose these problems, sometimes using their partnership with Texas A&M labs for detailed analysis.
Well Water Testing and Contamination Risk
Well water deserves its own section because it carries risks that municipal water does not. City water is treated, tested, and regulated by the EPA under the Safe Drinking Water Act. Private wells have none of those protections. The homeowner is solely responsible for water quality.
What to Test For
The EPA recommends testing private wells at least once per year for coliform bacteria, nitrates, total dissolved solids, and pH levels. For irrigation specifically, you should also test for:
- Iron and manganese (the primary culprits behind emitter clogging in well fed drip systems)
- Sulfur bacteria (produces hydrogen sulfide, the rotten egg smell, which creates biofilms inside tubing)
- Hardness (calcium carbonate levels above 150 ppm accelerate scale buildup)
- Electrical conductivity / salinity (high salt water damages plants, especially in the already alkaline soils of West Texas)
Practitioners on Reddit frequently report that well water systems clog emitters far faster than municipal setups. One user on an irrigation forum noted their emitters needed cleaning every two weeks until they added a disc filter and began quarterly line flushing. That matches what professionals see in the field regularly.
Contamination Risks Specific to Irrigation
The concern with well water isn’t just about clogging. If a well is shallow or poorly sealed, surface runoff containing pesticides, fertilizer, or animal waste can infiltrate the water table. According to the USGS, nitrate contamination is one of the most widespread groundwater quality problems in agricultural regions, including parts of West Texas. Using contaminated well water for drip irrigation can introduce pathogens to edible crops or push excess nitrogen into the soil, causing nutrient imbalances.
A basic well water test kit from a county extension office typically costs $20 to $50. A more comprehensive lab analysis through Texas A&M runs $50 to $150 depending on the parameters tested. That’s a small price compared to replacing an entire emitter network or dealing with sick plants.
For properties where well water quality is marginal, pairing proper filtration with soil testing through TAMU helps track whether mineral accumulation is reaching harmful levels over time.
Water Filtration for Non Potable Sources
If your water source for drip irrigation is a well, pond, or rainwater tank, you must filter it. This water contains sand, silt, algae, and other organic debris that will quickly clog the tiny passages in drip emitters. A simple screen or disc filter is essential. For drip systems, a filter with a rating of 120 to 150 mesh is typically recommended to catch particles before they cause blockages.
Disc filters tend to outperform screen filters for organic debris because their layered design traps fine particles more effectively. Screen filters work well for sandy or gritty water. Many experienced growers use both in sequence (a screen filter first, then a disc filter) for the cleanest possible water.
If clogs persist despite filtration, our drip sprinkler repair guide covers quick fixes and maintenance tips. Cleaning one filter is far easier than trying to unclog dozens of individual emitters.
Rainwater Storage Tank Sizing for Drip Irrigation
Rainwater harvesting sounds simple: collect what falls on your roof and store it. The tricky part is figuring out how large a tank you actually need. Undersize the tank and you’ll run dry mid season. Oversize it and you’ve spent money on capacity you’ll never fill.
How Much Rain Can You Actually Collect?
The formula is straightforward. For every 1 inch of rainfall on 1,000 square feet of roof, you can collect roughly 600 gallons (accounting for typical losses from gutters, first flush diverters, and evaporation). Lubbock receives an average of about 18 to 19 inches of rain per year according to NOAA data, but that rain is unevenly distributed. Most arrives during late spring and early fall thunderstorms, with long dry stretches in between.
For a home with 1,500 square feet of rooftop collection area:
- Annual potential harvest: 1,500 x (18/1,000) x 600 = roughly 16,200 gallons per year
- Monthly average: about 1,350 gallons
That sounds generous until you compare it to irrigation demand.
Matching Storage to Demand
Using the demand estimation from earlier, a 200 square foot vegetable bed at peak summer needs roughly 37 gallons per day, or about 1,110 gallons per month. A single 1,500 gallon tank would cover that bed for roughly 40 days without any new rainfall, enough to bridge most dry spells but not an entire West Texas summer.
Here’s a practical sizing table:
Practitioners on YouTube walkthroughs of rainwater drip systems commonly recommend sizing your tank for at least 30 days of dry weather reserve. In arid climates like West Texas, 45 days is a safer target if the budget allows.
Tank Types and Placement
Polyethylene (plastic) tanks are the most common and affordable, available in sizes from 250 to 10,000+ gallons. Galvanized steel tanks are popular in rural Texas for their durability and aesthetics. Underground cisterns save space but cost significantly more to install.
Place the tank on a stable, level pad as close to the gutter downspout as possible. Elevation matters: every foot of height above the drip system adds about 0.43 PSI of gravity pressure. Most rain barrel setups still need a small booster pump to reach the 15 to 30 PSI that drip systems require.
Cost Considerations for a Rainwater Irrigation System
Building a rainwater fed drip system involves more upfront investment than simply connecting to a hose spigot. Understanding the cost breakdown helps you decide if the water savings and sustainability benefits justify the expense.
Component Costs
Here’s what to budget for a basic residential rainwater to drip setup:
- Gutter collection and first flush diverter: $100 to $300 (assuming gutters already exist)
- Storage tank: $0.50 to $1.50 per gallon of capacity. A 1,500 gallon polyethylene tank typically runs $750 to $1,500. Galvanized steel tanks cost roughly 2x more.
- Tank pad or stand: $50 to $300 depending on whether you pour concrete or use a gravel base
- Booster pump (1/2 HP, suitable for most residential drip systems): $150 to $400
- Filtration (screen plus disc filter, first flush diverter): $50 to $150
- Drip tubing, emitters, pressure regulator, timer: $100 to $300 for a small to mid size garden
- Installation labor (if not DIY): $500 to $2,000 depending on complexity
Total estimated range for a 1,500 gallon system with a 200 to 500 square foot drip zone: $1,700 to $4,950.
Payback Period and Long Term Value
Municipal water in Lubbock costs roughly $4 to $6 per 1,000 gallons depending on usage tier. If a rainwater system offsets 15,000 gallons per year, that’s a savings of $60 to $90 annually on the water bill alone. At that rate, the payback period on a mid range system is long, often 20+ years based purely on water cost savings.
But the real value extends beyond the water bill. Rainwater is naturally soft, free of chlorine, and low in dissolved minerals, which means fewer clogged emitters, less mineral buildup in soil, and healthier plant growth. In areas where water restrictions limit irrigation days, a rainwater tank provides a buffer that keeps plants alive during mandatory cutbacks.
Texas also offers incentives. Under state law (Texas Tax Code §151.355), rainwater harvesting equipment is exempt from sales tax. Some municipalities offer rebates for rainwater collection systems, though Lubbock’s current programs should be verified with the city.
For homeowners who want a system designed properly from the start, professional irrigation services can handle sizing, plumbing, and integration with existing landscape irrigation.
Frequently Asked Questions
What is the best water source for drip irrigation?
The best water source for drip irrigation is one that is reliable, clean, and provides adequate pressure and flow. For most people, filtered and pressure regulated municipal (city) water is the most convenient. Rainwater is an excellent sustainable choice but requires a storage tank, pump, and filtration.
Do I need a pump for my drip irrigation system?
You typically only need a pump if your water source for drip irrigation is non pressurized, such as a rain barrel or pond. A small pump can provide the necessary pressure (around 15 to 30 PSI) to operate the system effectively. Well water systems already have a pump.
How much pressure is ideal for a drip system?
Drip irrigation systems are designed for low pressure, usually between 15 and 30 PSI. This is why a pressure regulator is a required component when connecting to a higher pressure municipal or well water source.
Can I run a drip system from a rain barrel?
Yes, but you will likely need a small pump to create enough pressure. A rain barrel relying only on gravity may not have enough force to push water through the entire system, especially if the tubing runs are long or have to go uphill. Filtration is also crucial to remove debris from roof runoff.
Why do my drip emitters keep clogging?
Clogging is almost always caused by a lack of proper filtration or high mineral content in the water. Sand, silt, or algae from a non potable water source will cause clogs without a filter. Hard water can also create mineral scale buildup over time, which can be managed with periodic system flushing.
Is city water a good water source for drip irrigation?
Yes, city water is a reliable and clean water source for drip irrigation, but it almost always requires a pressure regulator to lower its pressure to a safe level for drip components. A backflow preventer is also legally required for safety. Pairing a rain/freeze sensor with your controller can further reduce water waste and help you comply with local watering rules.
How often should I test well water used for irrigation?
At minimum, once per year. Test for bacteria, nitrates, pH, hardness, and iron. If you notice changes in water color, smell, or a sudden increase in emitter clogging, test immediately. County extension offices and Texas A&M labs are affordable options for comprehensive analysis.
How big of a rainwater tank do I need for drip irrigation?
Size depends on your garden’s square footage and how many days of dry weather reserve you want. A good starting point for West Texas: calculate your peak daily water demand, multiply by 30 to 45 days, and choose a tank that meets or exceeds that number. A 200 square foot vegetable garden typically needs a 1,100 to 1,500 gallon tank for adequate dry spell coverage.
What is the first thing I should do before designing my drip system?
The very first step is to assess your water source. Perform a bucket test to measure your flow rate in GPM, and if using well water or rainwater, get a water quality test. These two pieces of information will determine how large your irrigation zones can be and what filtration you need.
Getting your water source for drip irrigation right from the start saves water, money, and hassle. If you’re in Lubbock or the surrounding West Texas area and need help designing a new system or troubleshooting an old one, reach out to the team at M&M Sprinklers. Our licensed team can help with everything from backflow testing to water quality analysis, ensuring your plants get exactly what they need to thrive.