
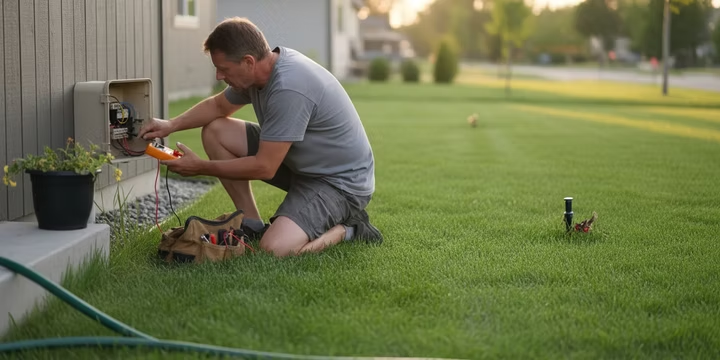
TL;DR
When your sprinkler system wont turn on, the problem traces back to one link in a simple chain: power, controller, sensors, wiring, solenoid, valve, or water supply. Most failures start at the easy end of that chain, like a tripped outlet or a forgotten rain delay setting, not underground. But sometimes the issue sits beyond the electrical path entirely: a cracked pipe bleeding pressure, a clogged nozzle, a damaged sprinkler head, a failed pump relay, or low water pressure throughout the system. This guide defines every component involved, explains how each one can stop your system cold, and tells you what to check before calling a pro.
Why Your Sprinkler System Wont Turn On (And Why the Fix Might Be Simpler Than You Think)
A sprinkler system that wont turn on feels like a big, expensive problem. You walk outside, the lawn is dry, and nothing is happening. The natural assumption is that something underground broke and you’re about to write a large check.
Usually, that assumption is wrong.
Irrigation professionals consistently report that the majority of “dead system” calls turn out to be something simple: a tripped outlet, a paused schedule, a sensor stuck in the wrong position. One Houston area irrigation practitioner noted that many repair calls in spring end up being a toggled “off” setting, a paused schedule, or a seasonal adjustment that got bumped during winter. A popular irrigation pro on YouTube (Yard Coach) lists the most common problems in order of likelihood, and power supply issues and timer setup mistakes top the list before anything underground even gets mentioned.
The trouble is, most homeowners don’t know the terminology well enough to diagnose the problem. You search “sprinkler system wont turn on” because you don’t yet know the words “solenoid,” “common wire,” or “rain delay.” That vocabulary gap makes everything harder.
This guide closes that gap. It defines every component in the diagnostic chain, explains how each one can prevent your sprinkler system from turning on, and tells you exactly what to check. The terms are organized by diagnostic stage (simplest fixes first, complex ones last), not alphabetically.
If you’re in the Lubbock area and want a professional to handle diagnosis, sprinkler repair in Lubbock can often resolve the issue in a single visit.
One more reason not to ignore the problem: according to the EPA’s WaterSense program, a single broken sprinkler head can waste up to 25,000 gallons of water per year. And research compiled by the Green Spaces Coalition shows that 30 to 60 percent of residential irrigation water is wasted due to leaks, broken components, and poor scheduling. A system that’s not working properly isn’t just an inconvenience. It’s money running into the ground.
The Diagnostic Chain: How to Think About a Sprinkler System That Won’t Start
Every residential irrigation system follows the same basic sequence:
Power → Controller → Sensors → Wiring → Solenoid → Valve → Water Supply
When a sprinkler system wont turn on, one of those links is broken. But the chain doesn’t capture everything. Problems can also sit outside the electrical path: a cracked pipe leaking pressure before water reaches the heads, a pump relay that never engages, clogged nozzles that make it look like nothing is working, or system wide low pressure that keeps heads from popping up. This guide covers all of it.
The goal is to figure out which link (or which peripheral component) failed, starting from the easiest and cheapest to check and working toward the more complex.
Section 1: Power and Electrical Terms
Power problems are the single most overlooked cause of a sprinkler system not turning on. They’re also the cheapest to fix, often costing nothing.
GFCI Outlet
A Ground Fault Circuit Interrupter outlet is the receptacle with “Test” and “Reset” buttons, commonly found in garages, on exterior walls, and near water sources. Many irrigation controllers are plugged into one. If the GFCI trips (from moisture, a power surge, or even a nearby appliance), it silently cuts power to the controller. The system looks dead, but the fix takes five seconds: press the Reset button.
Why it matters: One industry estimate from Texas Star Sprinklers suggests roughly 20 percent of homeowners experience tripped breakers or outlets without realizing it. If your sprinkler system wont turn on and the controller screen is blank, check this first.
Transformer
The transformer converts standard 120V household power into the 24V AC signal that the controller needs to open valves. It’s usually a small black box plugged into the wall or built into the controller housing. If the transformer fails, the controller may still display a clock (running on its backup battery), but it cannot send power to any solenoid.
A commonly missed issue: Practitioners at ProGreen Landscape highlighted that a controller running on backup battery alone will look alive on the screen but can’t activate anything. Homeowners see the display and assume the controller is fine, when the real problem is a dead transformer. For a deeper look at controller level diagnosis, see this irrigation controller repair guide.
Circuit Breaker
The breaker in your electrical panel that feeds the controller’s outlet. If it trips, the entire irrigation system loses power. This is especially common after storms or electrical surges. Open the panel, find the breaker labeled “irrigation,” “sprinkler,” or “exterior outlets,” and flip it back if it’s in the middle or off position.
Section 2: Controller and Programming Terms
The controller is where most people look first when their sprinkler system wont turn on, and that instinct is partly right. But controller problems are often about settings, not hardware.
Controller (Timer)
The brain of the system. It stores your watering schedule, sends 24V AC signals to each zone’s solenoid at the scheduled time, and provides the interface for manual operation. Rain Bird defines a station as “a circuit on the controller which activates a single control valve in the irrigation system to control watering for a particular zone.”
What to check: If the screen is on but no zones run, the problem might be a programming gap, an active rain delay, or a sensor override, not a broken controller.
Station
A single circuit on the controller assigned to one irrigation zone. Station 1 controls Zone 1’s valve, Station 2 controls Zone 2, and so on. Each station has its own wire running out to its valve’s solenoid. Understanding this relationship helps you figure out whether you have a system wide problem (all stations dead) or a zone specific one (only Station 3 won’t fire).
Rain Delay
A temporary pause feature that suspends all watering for a set number of hours or days. Many controllers activate rain delay automatically when connected to a rain sensor, and some homeowners activate it manually and then forget. This is one of the sneakiest causes of a sprinkler system that won’t turn on.
Why it’s so common: The delay is often buried in a menu or indicated by a small icon on the display. After a week of rain, you might have pressed a button to pause the system. Two weeks later, you’re standing in a dry yard wondering what broke. Check the display for any pause or delay icon, or navigate to the rain delay menu and set it to zero.
Program / Schedule
The complete watering plan stored in the controller, consisting of three elements: start time, run time per zone, and watering days. If any one of these three is missing or set to zero, the system won’t run on its own. This is a surprisingly common cause of spring startup failures, especially if the controller lost power over winter and reset to factory defaults. For help reprogramming after a reset, this Hunter controller programming guide walks through the process step by step.
Manual Run
Running a zone directly from the controller by pressing a button, rather than waiting for the schedule. This is a critical diagnostic tool. If your system works when you run it manually but won’t run on its automatic schedule, the problem is almost certainly programming or sensor related, not a hardware failure.
Section 3: Sensor Terms
Sensors are designed to save water by pausing the system under certain conditions. But when they malfunction, they can be the reason your sprinkler system wont turn on at all.
Rain Sensor
A device mounted on a fence, eave, or post that detects rainfall and tells the controller to skip watering. Rain Bird defines it as “a device which prevents the controller from activating the valves when a preset amount of rainfall is detected.” The problem? Rain sensors can get stuck in the “wet” position. Debris, insects, or a cracked cap can prevent the hygroscopic discs inside from drying out, which means the sensor permanently tells the controller “it’s raining, don’t water.”
How to test it: Switch the sensor bypass to “on” (or disconnect the sensor wires from the controller) and try running a zone. If the system fires up, you’ve found your culprit.
Freeze Sensor
Similar to a rain sensor, but it halts watering when the temperature drops below a set threshold (usually around 37°F). Freeze sensors are particularly relevant in West Texas, where spring mornings can hover near freezing well into March and April. A freeze sensor that trips on a cold morning may not reset until afternoon, leaving you confused about why the 6 a.m. watering cycle never ran.
Sensor Bypass
A physical switch or software toggle on the controller that temporarily ignores all sensor input. It’s usually labeled “Sensor” or “Bypass” with an on/off toggle. Flipping this is the fastest way to determine if a sensor is blocking your system. If the sprinkler system turns on with the sensor bypassed, the sensor or its wiring is the issue, not the valves, not the controller, and not the pipes.
Section 4: Wiring Terms
Wiring failures are invisible from the surface but extremely common, especially in older systems or areas with shifting soil. In Lubbock and across West Texas, clay soil movement after rain events loosens underground connections and packs valve boxes with silt, accelerating corrosion.
Common Wire (C Wire)
The shared return wire that connects every valve in the system back to the controller’s “C” or “COM” terminal. Think of it as the highway that all zones share. If the common wire breaks or its connection corrodes, every single zone stops working at once.
Practitioner insight: On the Rachio Community forum, when a homeowner reported all zones suddenly stopped on a Rachio 2nd gen controller, community experts immediately pointed to the common wire bundle in the valve box, not the controller. The user didn’t even know where the valve boxes were located. This reveals a key knowledge gap: homeowners often blame the controller when the failure point is underground.
What to check: Open your valve boxes and inspect the wire nuts connecting the common wire. Look for green corrosion, loose connections, or wires that have pulled free.
Zone Wire (Station Wire)
The individual wire running from a specific station terminal on the controller to a specific valve’s solenoid. If one zone won’t activate but the rest work fine, the zone wire or its solenoid is the likely failure point. For more on diagnosing solenoid specific failures, this guide on signs of a bad solenoid walks through the common symptoms.
Wire Nut
The twist on connector used to join wires underground, typically inside a valve box. These small plastic caps are one of the most frequent failure points in any irrigation system. Moisture seeps in, corrosion builds on the copper, and the connection weakens or breaks entirely. Waterproof gel filled wire nuts (sometimes called “grease caps”) last much longer but aren’t always used during original installation.
Multimeter
A handheld diagnostic tool that measures voltage, resistance, and continuity in electrical circuits. For sprinkler troubleshooting, a multimeter serves two purposes:
- Voltage test: Set to AC volts, touch the probes to a station wire and the common wire at the controller. When you activate that zone, you should see roughly 24V AC. No voltage means the controller isn’t sending a signal.
- Solenoid resistance test: Set to ohms, measure across the solenoid’s two wires. A healthy solenoid reads between 20 and 60 ohms. Zero ohms means a short circuit. “OL” (overload) or “1” on the display means an open circuit, indicating a broken coil inside.
According to Bluebird Sprinklers’ wiring guide, if wires are shorted together, a multimeter set to continuity mode will beep. If a wire is cut, you’ll see “OL” or infinite resistance. For a step by step walkthrough, see how to test a solenoid.
Section 5: Valve and Solenoid Terms
If power, programming, sensors, and wiring all check out, the problem is at the valve itself. This is where the system physically opens to let water flow.
Solenoid
An electromagnetic coil that sits on top of each control valve. When the controller sends 24V AC down the zone wire, the solenoid creates a magnetic field that lifts a small plunger inside the valve, allowing water to flow. When the signal stops, a spring pushes the plunger back down and the valve closes.
Diagnosis: A healthy solenoid reads 20 to 60 ohms on a multimeter. Zero means the coil is shorted. “OL” means the coil wire inside is broken. Either way, the solenoid needs replacement, which is a relatively inexpensive part (usually under $20) but can cost $75 to $215 for professional valve repair depending on accessibility and labor. If you’re replacing one yourself, this solenoid valve repair guide covers the process.
Diaphragm
The flexible rubber membrane inside each valve that controls water flow. When the solenoid opens, it releases pressure above the diaphragm, allowing water pressure from below to push it open. When the solenoid closes, pressure rebuilds above and forces the diaphragm shut.
Why it matters for “wont turn on”: Diaphragms can stick shut from debris, mineral buildup, or cold weather damage. This is especially common in systems that sat unused for months over winter. If the valve clicks (meaning the solenoid is working) but no water comes out, a stuck or torn diaphragm is a prime suspect.
Control Valve (Zone Valve)
The complete valve assembly, including the body, diaphragm, solenoid, and bleed screw. Each zone has one. The critical diagnostic distinction, highlighted by Sprinkler Warehouse’s troubleshooting guide: if a zone won’t stop running, it’s almost certainly a valve problem. If a zone won’t start, the failure could be anywhere in the chain. That distinction is rarely spelled out for homeowners, but it dramatically narrows the search.
The click test: When you activate a zone from the controller, walk to the valve box and listen. A click means the solenoid received power and actuated. Click but no water = supply or diaphragm problem. No click = electrical problem (controller, wiring, or solenoid). For a full walkthrough on valve level repairs, see this sprinkler valve repair guide.
Bleed Screw
A small screw on the valve body that, when loosened, manually opens the valve by releasing the pressure above the diaphragm. This bypasses all electrical components (controller, wiring, solenoid) and tests whether water supply is reaching the valve. If loosening the bleed screw produces water flow, you know the pipe and water supply are fine, and the problem is electrical. If nothing happens, the problem is upstream: water supply, backflow preventer, or main shutoff.
Valve Box
The green (usually) plastic access lid set at ground level, housing one or more valves and their wire connections. In West Texas, clay soil shifts and dust infiltration cause valve boxes to fill with silt over time. That silt gets into wire connections, solenoid ports, and even valve internals, causing corrosion and blockages. Bautista Pros, an irrigation company in Lubbock, notes that hard water deposits and West Texas dust cause faster nozzle clogging and mechanism fouling than most regions.
Section 6: Water Supply Terms
If everything electrical checks out, controller included, and the valves still produce no water, the problem is the water supply itself. This is the end of the electrical diagnostic chain but a surprisingly common cause of springtime “sprinkler system wont turn on” calls.
Main Shutoff Valve
The valve (typically a ball valve or gate valve near the house foundation or water meter) that controls water flow to the entire irrigation system. In cold climates and freeze prone areas like Lubbock, this valve is often turned off in late fall to protect against pipe damage. Come spring, homeowners forget to turn it back on. The controller runs its schedule, the solenoids click, but no water reaches the heads.
Quick check: Follow the irrigation supply pipe from the backflow preventer back toward the house. Locate the shutoff and confirm the handle is parallel to the pipe (open), not perpendicular (closed). If you’re doing a full spring startup, this sprinkler system startup guide covers the complete process.
Master Valve
An automatic valve controlled by the controller that opens before any zone runs. Not all systems have one, but when they do, the master valve acts as a system wide gate. If it fails, sticks, or loses its wiring connection, no zone gets water, even though each zone valve is functioning correctly. Check your controller’s settings to see if a master valve is programmed. If it is, test it the same way you’d test any zone valve: listen for a click, check the solenoid with a multimeter, and try the bleed screw.
Backflow Preventer
A mechanical device required by most municipalities (including the City of Lubbock) that prevents irrigation water from flowing backward into the drinking water supply. It has handles and test cocks that must be in specific positions for water to flow through. After winter maintenance, backflow testing, or any repair work, these handles are sometimes left in the closed position.
Why this matters locally: Lubbock requires backflow preventer testing on irrigation systems connected to municipal water. After a test, technicians may close the handles, and homeowners don’t realize the system is shut off until the first hot week arrives and nothing waters.
Backflow preventer repair is the most expensive common irrigation fix, averaging $603 to $1,097 nationally. Freeze thaw cycles in Lubbock (sub freezing temperatures are common from November through March) damage backflow preventers more frequently than in milder climates. For more on backflow devices, see this backflow preventer guide.
Section 7: Pump Start Relay Failure
Not every irrigation system pulls water from a municipal line. Systems fed by a well, pond, or cistern use a pump to push water through the pipes, and that pump is controlled by a pump start relay. If your system uses a pump and you’re getting no water at all, this relay deserves attention before you start digging.
What a Pump Start Relay Does
A pump start relay is a heavy duty switch that the controller activates whenever a zone turns on. The controller sends a low voltage signal (24V AC) to the relay, which then closes a high voltage circuit (120V or 240V) to power the pump motor. Without the relay engaging, the pump never kicks on and no water moves through the system.
How It Fails
Relays contain mechanical contacts that wear out over time. They can also fail from power surges, moisture intrusion into the relay housing, or corroded wiring connections. Practitioners on irrigation forums frequently report that pump start relays fail silently: the controller runs through its schedule, the solenoids click open, but nothing comes out because the pump never received power. It mimics a total water supply failure.
Signs of a bad relay:
- The controller activates zones normally but no water flows from any head
- You don’t hear the pump motor running when a zone starts
- The relay housing feels hot to the touch or shows burn marks
- A multimeter shows 24V AC arriving at the relay from the controller, but no output voltage reaching the pump
What to Do
First, confirm the controller has a pump start relay terminal (often labeled “P” or “MV/P”) and that it’s programmed to activate. Then check the relay itself: listen for a click when a zone turns on. No click usually means the relay coil is dead or the 24V signal isn’t reaching it. If the relay clicks but the pump doesn’t run, the high voltage side of the relay or the pump motor itself has failed.
Replacing a pump start relay is straightforward (the part typically costs $30 to $80), but it involves high voltage wiring. Unless you’re comfortable working with 120V or 240V circuits, this is a job for a professional. For systems with pump related low pressure issues, the relay should always be checked first.
Section 8: Cracked Pipe Leaks
Sometimes the system technically turns on, but so little water reaches the heads that it appears dead. Or one zone runs at a fraction of its normal pressure while the water meter spins wildly. The cause is often a cracked or broken pipe underground.
Why Pipes Crack
Irrigation pipes (usually PVC or polyethylene) crack for several reasons. Freeze damage is the most common in West Texas, where overnight temperatures can drop well below freezing even in early spring. Soil shifting in Lubbock’s expansive clay puts lateral stress on rigid PVC connections. Tree roots can also crush or displace pipes over time. Lawn equipment running over shallow lines is another frequent culprit.
Practitioners on Reddit report that cracked pipes are especially common on systems that weren’t properly winterized. One homeowner described turning the system on in April only to find a soggy patch in the yard and almost no pressure at the heads, a textbook underground leak scenario.
How a Cracked Pipe Mimics “Won’t Turn On”
A large enough crack can bleed off so much pressure that sprinkler heads on the affected zone barely pop up, or don’t pop up at all. From the homeowner’s perspective, the zone looks dead. The controller is running, the solenoid clicked, but nothing useful is happening at the surface.
Signs to watch for:
- An unusually soggy or green patch of lawn when no watering has occurred
- One zone runs with very low pressure while others seem fine
- The water meter continues spinning after all zones are shut off
- Muddy water or sediment coming out of heads on the affected zone
What to Do
If you suspect an underground leak, shut off the system and check whether the water meter is still moving. A spinning meter with everything off confirms a leak. Locating the exact break usually requires professional help, especially in clay soil where water can travel sideways before surfacing. For a detailed walkthrough, see this guide on detecting underground leaks.
Pipe repairs typically involve cutting out the damaged section and splicing in a new piece using couplings. Nationally, the average cost for a sprinkler line repair runs $150 to $350, depending on depth and accessibility.
Section 9: Sprinkler Head Damage and Misalignment
A damaged or misaligned sprinkler head won’t necessarily prevent the system from turning on, but it can make a zone appear nonfunctional. And in some cases, a broken head can cause enough pressure loss to affect the entire zone.
Common Types of Head Damage
Sprinkler heads take a beating. Lawnmowers clip them. Vehicles drive over them in driveways and near curbs. Foot traffic pushes them below grade. In West Texas, the expansive clay soil can shift heads out of position seasonally, tilting them sideways or burying them under displaced soil.
What happens when a head breaks: If the head body cracks or the riser snaps, water geysers from the break point instead of distributing through the nozzle. This drops pressure across the entire zone, often enough that other heads on the same zone barely function. A single broken head can make it look like the whole zone is dead.
Heads That Won’t Pop Up
Pop up heads rely on water pressure to rise from their housing. If a head is stuck in the retracted position, it could be:
- Packed with dirt or debris around the riser
- Damaged internally (a cracked or warped riser sleeve)
- Starved of pressure due to a leak or low pressure elsewhere in the zone
- Buried too deep from soil accumulation or sod growth
What to Do
Walk each zone while it’s running. Look for heads that aren’t popping up, heads spraying erratically, or spots where water is gushing from ground level instead of from a nozzle. A head that won’t rise can sometimes be freed by cleaning around the riser with a screwdriver and flushing debris. If the body is cracked, the head needs replacement, a $5 to $15 part and a 10 minute job in most cases.
For heads that have sunk below grade over time, a riser extension or reinstallation at the correct height solves the problem. For step by step instructions, see this sprinkler head repair guide.
Section 10: Clogged Nozzles
A clogged nozzle is one of the most common and most overlooked reasons a sprinkler zone appears to not be working. Water reaches the head, the head pops up, but little or nothing comes out.
Why Nozzles Clog
Nozzle openings are small, sometimes only a few millimeters across on spray heads. Sediment, sand, mineral deposits, and organic debris (grass clippings, insects, root fragments) can block them partially or completely. West Texas water is notoriously hard, and mineral buildup inside nozzles accelerates with each watering cycle.
Practitioners on YouTube irrigation channels frequently demonstrate nozzles that are 50 to 75 percent blocked with calcium deposits, producing a weak, misshapen spray pattern that barely wets anything. Bautista Pros (a Lubbock area company) specifically notes that hard water deposits and West Texas dust cause faster nozzle clogging than most regions.
How Clogged Nozzles Mimic Bigger Problems
When multiple nozzles on a zone are partially clogged, the zone’s coverage shrinks dramatically. You might see heads that are up but producing a thin, anemic stream instead of a full fan or rotor arc. The lawn dries out, and the homeowner assumes the system isn’t turning on properly or that pressure has dropped.
What to Do
Remove the nozzle from the head body (most unscrew or pull out). Soak it in a vinegar solution for 30 minutes to dissolve mineral deposits, then clear the openings with a small pin or needle. Rinse and reinstall. For heads with built in, non removable nozzles, flushing the head by removing the nozzle screen (the small filter inside) and running the zone briefly can push debris out.
If nozzles are heavily calcified or cracked, replacement nozzles cost $1 to $5 each. For a detailed walkthrough, see this nozzle replacement guide.
Preventive tip: install inline filters at the valve or head level, and flush zones periodically by removing a couple of nozzles and running the zone for 30 seconds to clear sediment from the lateral lines.
Section 11: Low Water Pressure
Low water pressure is a system wide condition that can make your sprinkler system look broken even when every component is technically functional. Heads pop up halfway. Rotors barely spin. Spray heads produce a sad little dribble instead of a crisp fan. You might conclude the system won’t turn on, when really it’s turning on but can’t perform.
What Causes Low Pressure in Irrigation Systems
Several things can reduce pressure below the threshold your heads need to operate (most spray heads require at least 15 to 30 PSI):
- Municipal supply issues: Water utilities sometimes reduce pressure during peak demand, construction, or maintenance. This is temporary but can be confusing if it coincides with your watering schedule.
- Partially closed valves: The main shutoff, backflow preventer handles, or a gate valve anywhere in the supply line may be only partially open, throttling flow.
- Too many heads on one zone: If a zone was expanded without accounting for the additional flow demand, the existing supply can’t maintain adequate pressure across all heads.
- A leak elsewhere in the system: A cracked pipe or broken head on another zone (or even on the same zone) can bleed pressure.
- A failing pressure regulator: Some homes have a pressure regulator on the main water line. If it malfunctions, it can reduce pressure to the entire house, irrigation included.
How to Check
Use a pressure gauge (available at any hardware store for under $15) threaded onto a hose bib near the irrigation supply. Turn off all indoor water use and read the static pressure. Residential systems typically need 40 to 65 PSI at the source. If you’re below 30 PSI, the problem is supply side, not in your irrigation system.
If static pressure is fine but drops dramatically when a zone runs, the issue is flow related: too many heads, a restriction in the line, or a leak. For a thorough walkthrough on pressure diagnosis, this guide on low water pressure causes and fixes covers each scenario.
Diagnostic Quick Reference Table
If you’d rather skip the detailed sections and jump straight to your symptom, use this table to find the most likely cause.
When to DIY vs. When to Call a Professional
Some of these fixes require nothing more than pressing a button or turning a handle. Others need specialized tools, underground access, or electrical knowledge. Here’s a practical split.
Safe and straightforward DIY tasks:
- Resetting a GFCI outlet or flipped breaker
- Clearing a rain delay setting
- Reprogramming a controller schedule
- Bypassing a sensor to test whether it’s the problem
- Opening backflow preventer handles
- Turning on the main shutoff valve
- Cleaning corrosion from wire nuts in an accessible valve box
- Loosening a bleed screw to test water supply
- Cleaning or replacing clogged nozzles
- Replacing a broken sprinkler head
- Checking static water pressure with a gauge
Better left to a professional:
- Underground wire breaks or wire tracing
- Solenoid or valve replacement in hard to access boxes
- Backflow preventer repair or replacement
- Controller wiring diagnosis involving multiple zone failures
- Master valve troubleshooting on systems where the valve box can’t be located
- Pump start relay replacement (involves high voltage)
- Locating and repairing underground pipe leaks
- System wide low pressure diagnosis when the cause isn’t obvious
- Any situation involving electrical testing you’re not comfortable performing
Cost context: The national average for sprinkler repair runs about $210, with most jobs falling between $161 and $300. Controller and timer repairs average $148 to $268. Individual valve repairs run $75 to $215. The hourly rate for irrigation repair pros typically falls between $81 and $149. For a detailed breakdown by repair type, see this sprinkler repair cost guide.
Preventing the Next “Wont Turn On” Moment
The Yard Coach, a well known irrigation pro on YouTube, recommends seasonal inspections every 60 to 90 days. That cadence catches small problems (a slowly corroding wire nut, a sensor cap filling with debris, a diaphragm starting to stiffen, a nozzle gradually clogging with mineral deposits) before they become the reason you’re standing in a dry yard searching for answers.
Research from the Green Spaces Coalition and supporting academic studies show that simple maintenance can cut outdoor water use by 20 to 30 percent. Given that the EPA reports homes with automatic irrigation systems use roughly 50 percent more water outdoors than homes without, keeping your system properly maintained isn’t just about a green lawn. It’s about not paying for water that never reaches a root.
A few specific preventive steps that address the new failure modes covered in this guide:
- Flush nozzles once per season by removing them and running the zone briefly to clear sediment from lateral lines
- Walk each zone while running at least twice a year to catch damaged heads, misaligned spray patterns, and soggy spots that indicate underground leaks
- Check your pump start relay (if applicable) at spring startup by listening for the pump motor when a zone activates
- Measure static water pressure at least once a year, especially if you notice gradual performance decline across zones
For a full rundown of what to check each season, this seasonal maintenance checklist covers spring startup through fall winterization. M&M Sprinklers also offers maintenance membership plans that include scheduled system checkups, seasonal programming, and priority scheduling during Lubbock’s busiest months.
Frequently Asked Questions
Why wont my sprinkler system turn on even though the controller has power?
The most common reason is that the controller is running on its internal backup battery, not the main 24V AC power supply. The backup battery keeps the clock and display alive but cannot send enough power to open any solenoid. Check that the transformer is plugged in, the GFCI outlet hasn’t tripped, and the breaker hasn’t flipped. Also check for an active rain delay or a sensor override that’s preventing scheduled runs.
All my sprinkler zones stopped working at once. What happened?
When every zone fails simultaneously, the most likely cause is a broken or corroded common wire (C wire). This single wire connects all valves back to the controller, so one break kills everything. Open your valve boxes and inspect the wire nut connections for corrosion, loose wires, or moisture damage. A master valve failure or a failed pump start relay can also cause total system shutoff.
My sprinkler system works when I run it manually but won’t run on its schedule. What’s wrong?
This almost always points to a programming issue or a sensor problem, not a hardware failure. Check that your schedule has valid start times, run times, and active watering days. Then check for an active rain delay. If those look correct, try bypassing your rain or freeze sensor. If the scheduled run works with the sensor bypassed, the sensor needs cleaning or replacement.
How do I test a sprinkler solenoid to see if it’s bad?
Use a multimeter set to ohms. Disconnect the solenoid wires and touch one probe to each wire. A healthy reading falls between 20 and 60 ohms. A reading of zero means the coil is shorted. “OL” or “1” on the display means the coil is broken (open circuit). Either result means the solenoid needs to be replaced.
Could the backflow preventer cause my sprinkler system not to turn on?
Yes. If the backflow preventer’s handles are in the closed position (perpendicular to the pipe), no water reaches any valve. This is common after winter shutdowns, backflow testing, or plumbing work. Check that both handles are fully open (parallel to the pipe). In Lubbock, where annual backflow testing is required, this is one of the most frequent spring startup issues.
Can a cracked pipe make my sprinkler system look like it’s not working?
Absolutely. A large enough crack underground can bleed off so much pressure that heads on the affected zone barely pop up or don’t pop up at all. Look for unusually soggy patches, muddy water at the heads, or a water meter that keeps spinning after the system is shut off. Underground leak repair typically requires professional diagnosis and excavation.
My sprinkler heads pop up but barely spray anything. Is the system broken?
Probably not broken, but something is restricting flow. The two most common causes are clogged nozzles and low water pressure. Remove a nozzle and check for mineral deposits or debris. If the nozzles are clear, use a pressure gauge on a nearby hose bib to check your static water pressure. Below 30 PSI will starve most spray heads.
What is a pump start relay and could it be why nothing works?
A pump start relay is a switch that the controller triggers to turn on an irrigation pump (used on well fed or pond fed systems). If the relay fails, the pump never starts and no water moves. You’ll hear solenoids clicking but get zero water from any zone. Check for a click at the relay when a zone activates. No click usually means the relay coil is dead.
What does it cost to fix a sprinkler system that wont turn on?
It depends on the failed component. Nationally, the average sprinkler repair costs about $210. Controller repairs average $148 to $268, valve repairs $75 to $215, and backflow preventer repairs $603 to $1,097. Pipe repairs run $150 to $350. Many of the most common causes (tripped GFCI, rain delay, closed shutoff valve, clogged nozzle) cost nothing to fix.
How often should I inspect my sprinkler system to prevent failures?
Every 60 to 90 days is the general recommendation from irrigation professionals. A quick seasonal check (running each zone, inspecting for leaks, confirming sensor function, checking wire connections, and cleaning nozzles) catches developing problems before they escalate. Spring and fall are the most critical inspection windows, especially in freeze prone areas like West Texas.
My sprinkler system stopped working after winter. Where do I start?
Start with the water supply. Confirm the main shutoff valve is open. Check that the backflow preventer handles are in the open position. Then check the controller: it may have lost its programming during a power outage. Run each zone manually from the controller. If nothing responds, check the GFCI outlet and breaker. If some zones work and others don’t, you’re likely looking at freeze damaged valves, cracked pipes, or wiring connections that loosened over winter.