
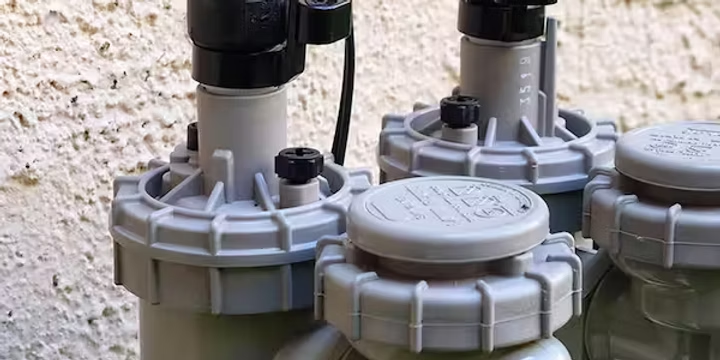
If one zone of your sprinkler system refuses to turn on while the rest work fine, there’s a good chance the problem is a small, inexpensive part called a solenoid. It’s the electromagnetic coil that tells your irrigation valve to open and close. When it fails, a single zone can go dead, flood your yard, or weep water all day long. For Lubbock and West Texas homeowners, where summer heat can scorch a lawn in days, a stuck or burnt out solenoid is a problem you can’t afford to ignore.
This guide covers how to identify a bad sprinkler solenoid, what a solenoid replacement involves, how to find the valve in the first place, and when it makes sense to call the experienced team at M&M Sprinklers. We’ve also added sections on lightning induced failures and controller error diagnosis, two topics that come up constantly in West Texas.
Need a professional diagnosis right away? M&M Sprinklers offers fast, upfront sprinkler repair across the Lubbock area.
Is a Solenoid Replacement Really Necessary?
Before you start buying parts, it’s smart to confirm the solenoid is actually the problem. Zone failures can stem from wiring issues, controller faults, or even a torn diaphragm inside the valve. A few key signs and simple tests can point you in the right direction.
Common Symptoms of a Faulty Sprinkler Solenoid
The clues are usually obvious if you know what to look for. A single sprinkler zone that won’t start when the rest of the system works fine often points to a burnt out solenoid. On the flip side, a zone that runs continuously, flooding your lawn long after it should have stopped, suggests a solenoid stuck in the open position.
Other signs include:
- Low or Uneven Pressure: A solenoid that is partially stuck or clogged with debris can restrict water flow, causing sprinklers in that zone to spray weakly or produce poor coverage. In Lubbock’s alkaline, mineral heavy water, sediment buildup inside valves is a common culprit.
- Leaks at the Valve Box: If you notice pooling water or constant dampness around the valve box, the solenoid’s seal may have failed.
- Weeping Sprinkler Heads: Water slowly trickling from sprinkler heads when the system is off can indicate a solenoid that isn’t closing completely.
- Buzzing or Clicking Sounds: An unusual humming or clicking from the valve box when a zone tries to activate can be the sound of a solenoid trying but failing to open.
Practitioners on Reddit’s Lubbock forums frequently mention zone failures as one of the most common warm season sprinkler headaches, with many homeowners initially unsure whether the issue is the controller, the wiring, or the valve itself. That uncertainty is exactly why a proper diagnosis matters before replacing anything.
DIY Solenoid Troubleshooting Checklist
A little diagnostic work can save you time and money. For irrigation systems, a multimeter is your best friend. Follow this checklist to narrow things down.
- Check for Power at the Controller: Is the controller sending voltage to the zone? Set your multimeter to AC volts (VAC). Run the problematic zone from your controller and touch the multimeter probes to the two screw terminals for that zone. A functioning controller should send about 22 to 26 volts. If you get no reading, the problem is likely with the controller or the wiring, not the solenoid.
- Test the Solenoid Coil: Is the coil itself bad? Disconnect the power to the controller. At the valve box, disconnect the two wires from the suspect solenoid. Set your multimeter to ohms (Ω) to test for resistance. A healthy 24 VAC sprinkler solenoid should read between 20 and 60 ohms. A reading of zero (or very close) means the coil is shorted.An infinite or “OL” reading means the internal wire is broken (an open circuit).In either case, the solenoid needs to be replaced.
- Manually Open the Valve: Does the valve work mechanically? Most solenoids have a feature that allows you to turn them a quarter or half turn counter clockwise to manually open the valve. If water flows and the sprinklers work normally, it confirms the valve body and diaphragm are likely okay, pointing back to an electrical issue with the solenoid.
If you’re not comfortable using a multimeter or working inside a muddy valve box, M&M Sprinklers’ licensed irrigators handle this kind of diagnosis daily. Their technicians run each zone individually, checking for exactly these issues during every service call and system checkup.
The Big Decision: Repair vs. Replace the Solenoid
Once you’ve identified a solenoid issue, you have a choice.
- Clean and Inspect: Sometimes debris like sand, caliche, or small pebbles gets lodged in the valve port, preventing the solenoid’s plunger from sealing. West Texas water can carry quite a bit of grit, so this is worth checking first. A simple cleaning may solve the problem entirely.
- Replace the Solenoid Only: If your troubleshooting points to a bad electrical coil, you can almost always replace just the solenoid itself. This is the most common, cost effective, and straightforward repair.
- Replace the Entire Valve: If the valve body is cracked and leaking, or if you’ve replaced the solenoid and the zone still won’t shut off (often due to a torn internal diaphragm), you’ll need to replace the entire valve assembly. This is a more involved job that may call for a professional valve repair.
Finding Your Valve Box: Valve Locating for Solenoid Access
You can’t replace a solenoid if you can’t find it. In newer subdivisions around Lubbock, valve boxes are usually near the water source or along the edge of the lawn where they’re relatively easy to spot. But in older neighborhoods, especially those built in the 1980s and 1990s, valve boxes routinely get buried under years of soil buildup, bermudagrass runners, and landscaping changes.
Why Valve Boxes Disappear
Lubbock’s soil shifts. Caliche layers expand and contract with moisture changes, and over the years, valve box lids can sink several inches below grade. Landscapers who don’t know where the boxes are may lay sod or mulch right over them. One irrigation forum user described probing his entire front yard with a long screwdriver for an hour before finding a box buried four inches deep under St. Augustine turf.
How to Locate a Buried Valve Box
Start with what you know. Walk the perimeter of your yard near the main water line or backflow preventer, because most valve manifolds are installed within 10 to 20 feet of the water source. If you have your original irrigation plan or can request one from your installer, it will show approximate valve locations.
When that doesn’t work, try these approaches:
- Probe the soil. Push a long screwdriver or thin metal rod into the ground in a grid pattern. The plastic lid will feel distinctly different from soil and caliche.
- Follow the wires. If you can access the wire bundle at the controller, a wire tracker (sometimes called a valve locator or 521 locator) sends a signal down the wire to the solenoid, letting you trace the path. Professional irrigation companies use these daily. M&M Sprinklers has detailed guidance on locating sprinkler lines that applies to finding buried valve boxes too.
- Listen for the click. Turn on the zone from your controller and walk the area slowly. Many solenoids make an audible click or hum when they activate, which can help you zero in on the spot.
- Look for turf differences. Grass directly above a valve box sometimes grows differently (greener and taller, or thinner and yellowed) because of the different soil depth and drainage over the box.
If you’ve searched without luck, that’s a perfectly valid reason to call a professional. M&M’s technicians have located thousands of valve boxes across Lubbock’s older neighborhoods, and they carry the electronic locating equipment to find them quickly.
Lightning Induced Solenoid Failure: A West Texas Problem
West Texas gets its share of severe thunderstorms, particularly from late spring through early fall. Lightning is one of the most overlooked causes of solenoid failure, and it tends to kill multiple solenoids at once rather than just one.
How Lightning Destroys Solenoids
Irrigation wiring acts like an antenna buried in the ground. When lightning strikes near your property, the electrical surge can travel through the soil, enter the irrigation wiring, and blow through every solenoid coil connected to it. According to the University of Florida’s IFAS Extension, lightning induced surges are the leading cause of multiple simultaneous solenoid failures in residential irrigation systems.
The telltale sign is distinctive: you’ll have two, three, or all zones go dead after a storm, rather than just one. The controller may also show error codes or refuse to activate any zone. When you pull the solenoids and test them with a multimeter, you’ll typically find open circuits (infinite resistance) across several coils.
Practitioners on Reddit report that after big storms in the Lubbock area, it’s common to see a wave of posts about “all my sprinkler zones stopped working overnight.” The culprit is almost always a lightning surge that cooked the solenoid coils and sometimes the controller’s triac output board as well.
Protecting Your System from Lightning Damage
A quality surge protector installed at the irrigation controller is the single best defense. These devices cost between $30 and $100 and clamp voltage spikes before they reach the wiring. Some models are designed specifically for irrigation controllers and mount directly on the controller’s terminal strip. The Hunter ICD series surge protectors are popular with professional installers.
A proper grounding rod at the controller location also helps. According to the Irrigation Association’s best practice guidelines, a dedicated ground rod (separate from the home’s electrical ground) gives lightning energy a path to dissipate before it enters the solenoid wiring.
If your system gets hit, don’t just replace the solenoids and call it done. Test the controller’s output on each station as well. A damaged triac on the controller board can appear to send voltage but deliver an unstable signal that burns out new solenoids within weeks. M&M Sprinklers’ technicians check for controller damage as part of every storm related service call, which brings us to the next topic.
Controller Error Diagnosis for Solenoid Issues
Sometimes the solenoid is perfectly fine, but the controller is the real problem. Before you spend an afternoon in a muddy valve box, it’s worth ruling out the controller as the source of the zone failure.
Common Controller Errors That Mimic Solenoid Failure
Modern irrigation controllers like the Hunter X2 or Rain Bird ESP series display error codes that can point you directly to the issue. Here are the most common scenarios:
- “Short Circuit” or “SHT” error on a zone. This means the controller detected excessive current draw. It could be a shorted solenoid, but it can also mean two bare wires are touching each other underground. The controller protects itself by shutting down that station.
- “Open Circuit” or no current draw. The controller tries to send power but detects nothing connected. This can mean a broken wire somewhere between the controller and the valve, a corroded splice, or a truly dead solenoid coil.
- Station skipping. Some controllers will skip a zone entirely if they detect a fault, moving to the next one in the program. If a zone appears to be skipping during its cycle, check the controller’s error log before assuming the solenoid failed.
- No display or erratic behavior. A controller that’s lost its programming (common after a power outage or lightning event) won’t run any zones. This isn’t a solenoid problem at all.
How to Test the Controller’s Output
Set your multimeter to AC volts and touch the probes to the common terminal and the zone terminal while manually running that station. You should see 24 to 28 VAC. If the reading is significantly lower (under 20 VAC), the controller’s transformer or output triac may be weak. If you get zero, the controller isn’t sending power at all.
One YouTube walkthrough by a licensed irrigator demonstrated a useful technique: carrying a known good solenoid to the controller and connecting it directly to the zone terminals with short test leads. If the test solenoid clicks and pulls in its plunger, the controller output is healthy and the problem is somewhere in the field wiring or at the valve. If the test solenoid does nothing, the controller needs repair or replacement.
For more advanced troubleshooting, check our guide on diagnosing valve solenoid problems.
When the Controller Needs Replacement
Controllers last a long time, but they don’t last forever. If your unit is 10 to 15 years old and showing multiple zone errors, it may be more cost effective to upgrade to a smart controller like the Hunter X2 with Hydrawise rather than chasing intermittent electrical gremlins. Smart controllers also add weather based scheduling and flow monitoring, which can catch future solenoid or valve failures before they damage your lawn.
Learn more about next generation sprinkler technology and what a smart controller upgrade looks like.
Gearing Up for Your Solenoid Replacement
Having the right tools and parts on hand makes the job go smoothly. A little preparation prevents you from having to stop halfway through with water pooling in your valve box.
Required Tools and Parts
Most sprinkler solenoid jobs require a basic toolkit. You’ll want an adjustable wrench, a screwdriver for the valve box lid, and wire strippers. A multimeter is also highly recommended for diagnosis.
For parts, you will need:
- A compatible replacement solenoid. Make sure the voltage and thread type match your existing valve model. If your system uses Hunter, Rain Bird, or Irritrol valves (all common in Lubbock area installations), confirm the brand before buying.
- A couple of waterproof wire connectors. Standard electrical tape or indoor wire nuts will fail underground.
- PTFE thread seal tape if you are removing any threaded pipe fittings.
- A bucket or some rags to manage the small amount of water that will spill out.
Safety Precautions First
Working with water and electricity requires caution. Before you do anything else, shut off the main water supply to the irrigation system. This prevents a high pressure surprise when you open the valve. Next, disconnect the power to the irrigation controller by unplugging it or turning off its circuit breaker. While sprinkler systems use low voltage (around 24 VAC), it’s always best to eliminate any risk of shock or short circuits. Wear safety glasses and gloves to protect yourself from dirt and debris, especially in Lubbock where caliche laden soil can be abrasive.
A Step by Step Guide to Sprinkler Solenoid Replacement
With your tools gathered and safety measures in place, you’re ready to perform the solenoid replacement.
1. Locate the Correct Solenoid
Solenoids are attached to zone valves, which live in green or black plastic boxes buried in your yard. If you have multiple zones, you may find several valves and their attached solenoids in one box. In older Lubbock neighborhoods, valve boxes can settle over time and become hidden under grass or mulch. Refer to the valve locating section above if you’re having trouble finding yours.
2. Disconnect Wires and Remove the Old Solenoid
With the power confirmed to be off, open the valve box. You’ll see two wires coming from the solenoid connected to the main system wiring. Unscrew the waterproof wire connectors and separate the wires.
Now, grip the cylindrical plastic body of the old solenoid and turn it counter clockwise to unscrew it from the valve. Be ready for a small amount of water to spill out. Once it’s loose, lift it straight out.
3. Inspect and Clean the Valve Port
Before installing the new part, look inside the port where the solenoid was. You should see a small internal plunger and spring. Carefully remove them if they didn’t come out with the solenoid body. Check the port for any dirt, sand, or tiny rocks. Use a rag or your finger to wipe it clean. A clean surface is essential for the new solenoid to seal properly. Given the mineral content and sediment typical of West Texas water, this step is especially important.
4. Install the New Solenoid
Installing the new part is the reverse of removal. First, make sure the small O ring is present on the base of the new solenoid, as this creates the waterproof seal. Place the new plunger and spring into the valve port, then screw the new solenoid on by turning it clockwise until it’s snug. Hand tightening is usually sufficient; overdoing it can crack the plastic housing.
Next, reconnect the wires. Use your new waterproof wire connectors to securely join the solenoid wires to the system wires, matching the common wire and the zone wire just as they were before.
5. Secure Connections for a Lasting Repair
A successful solenoid replacement is about more than just swapping parts. A few key details ensure your repair holds up through Lubbock’s hot summers and occasional hard freezes.
Proper Torque on Connections
When tightening the solenoid or any other valve components, aim for “just right.” If a connection is too loose, it will leak. If it’s too tight, you risk stripping the threads or cracking the plastic valve body. A common rule is to hand tighten the component and then give it about a quarter turn more with a wrench. Never use the solenoid itself as a handle to tighten the valve.
Orienting the Valve’s Flow Direction
If your repair involves replacing the entire valve body, pay close attention to the flow direction arrow on the new valve. Installing a valve backward will prevent it from working at all, as the internal diaphragm is designed to operate with water flowing in only one direction. M&M Sprinklers’ technicians see this mistake from time to time on systems where a previous homeowner or handyman attempted a valve replacement without checking orientation.
The Importance of Waterproof Wire Connectors
This cannot be overstated: always use waterproof wire connectors for buried irrigation wiring. Moisture will quickly corrode connections made with standard wire nuts, leading to intermittent problems or total failure. These special connectors are filled with silicone or grease that completely seals the splice from the elements. In discussion threads on Reddit, Lubbock area homeowners who’ve dealt with recurring zone failures often discover that a previous repair used regular wire nuts, which corroded within a season.
6. Test the Repaired Zone
With the new solenoid in place, it’s time to see if your work paid off.
First, turn the water supply back on slowly to avoid a pressure surge that could damage your pipes or valves. Check the valve box for any leaks around the new solenoid. If everything is dry, head to your controller and manually run that specific zone. The sprinklers should turn on with full, even coverage, and when you stop the cycle, they should shut off completely. A successful function test means your solenoid replacement is complete.
7. Troubleshoot if the Zone Still Doesn’t Work
If the zone still doesn’t work, don’t panic. If you’ve confirmed the new solenoid is getting power but the valve won’t open, the issue lies deeper within the valve itself, like a torn internal diaphragm or more significant debris blockage. At this point, you can either disassemble and rebuild the valve or call in a professional.
For complex diagnostics in the Lubbock area, the licensed irrigators at M&M Sprinklers can quickly pinpoint the root cause. With a licensed irrigator and licensed irrigation technicians on staff, plus decades of experience with Lubbock’s soil and water conditions, they’ve seen just about every valve and wiring problem that can come up.
Common Mistakes and Long Term Maintenance
Avoiding a few common errors can make your solenoid replacement a success and keep your system running well for years.
Common Mistakes to Avoid
- Forgetting to turn off water or power: This is the most critical and often overlooked step.
- Over tightening connections: This can crack the plastic housing, turning a simple repair into a bigger one.
- Not using waterproof connectors: This almost guarantees the connection will fail from corrosion down the road.
- Using the wrong part: Solenoids are not universal. Using an incompatible model simply won’t work. Bring the old solenoid to the supply house or snap a photo of the valve brand and model number.
- Skipping the cleaning step: West Texas water carries enough sediment that a dirty valve port can cause a brand new solenoid to stick.
- Ignoring lightning damage to the controller: Replacing solenoids after a storm without testing the controller’s output is a recipe for repeat failures. Always verify the controller is healthy first.
How to Extend a Solenoid’s Lifespan
Proactive maintenance can prevent future headaches. Winterizing your system by blowing out the lines before a hard freeze is important in Lubbock, where temperatures can drop fast in late fall. Installing filters can reduce sediment that wears down internal parts, and a surge protector for your controller can protect solenoids from electrical spikes during West Texas thunderstorms.
Periodic sprinkler system maintenance checkups catch small issues before they become major repairs. M&M Sprinklers offers Gold and Technology maintenance plans that include scheduled inspections, seasonal programming adjustments, and up to four free sprinkler heads per visit. The Technology Plan even provides live flow monitoring that can alert you to a failing valve or solenoid before you notice dead grass.
Compare the plans side by side in the maintenance plan comparison checklist.
If you haven’t had your backflow preventer tested recently, that’s another item worth scheduling, as it’s required by the City of Lubbock and M&M has a licensed BPAT tester on staff to handle it.
Cost and Time Estimates for Sprinkler Solenoid Replacement
Solenoid replacement is one of the more affordable irrigation repairs. For a DIY job, the part itself typically costs between $15 and $40. The work can usually be completed in under an hour once you’ve located the valve box and confirmed the diagnosis.
If you hire a professional in the Lubbock area, expect to pay for the part plus a service call fee and labor, which could range from $125 to $300 or more depending on the complexity. Factors that can increase cost include hard to find valve boxes, corroded wiring that needs to be re run, or discovering that the valve body itself needs replacement.
M&M Sprinklers is upfront about pricing and will give you an estimate before any work begins.
When to Skip DIY and Call a Lubbock Sprinkler Pro
A single solenoid replacement is a manageable DIY project for a confident homeowner. But certain situations call for professional help:
- Multiple zones are failing. This often points to controller problems, shared wiring faults, lightning damage, or a mainline issue rather than individual solenoids.
- You can’t locate the valve boxes. In older Lubbock yards, boxes can be buried or misplaced. A pro with experience in the area knows where to look and carries electronic locating equipment.
- The system is old and outdated. If your system hasn’t been updated in 15 or 20 years, a solenoid swap might just be a band aid. M&M Sprinklers specializes in irrigation renovations, upgrading legacy systems with proper head to head coverage, efficient nozzles, and smart controllers like the Hunter X2 with Hydrawise.
- You suspect storm damage. Lightning can take out solenoids, wiring, and the controller simultaneously. Diagnosing what survived and what didn’t requires systematic testing across the entire system.
- You want it done right, fast. During Lubbock’s peak watering season, every day without a working zone means brown spots. M&M keeps their crew numbers manageable so each technician knows your system and can get the job done without repeat visits.
With a 5.0 star rating across more than 390 Google reviews and roots in Lubbock since 1987, M&M Sprinklers handles everything from a quick solenoid replacement to full system redesigns. They also offer certified arborist services, so if your trees and irrigation need coordinated attention, one call covers both. Reach them at (806) 794 1300 or visit mmsprinklerslbk.com.
Frequently Asked Questions about Solenoid Replacement
1. How do I know for sure if my sprinkler solenoid is bad? The most reliable way is to test it with a multimeter. A healthy 24 VAC solenoid should have a resistance reading between 20 and 60 ohms. A reading of 0 or infinity indicates a faulty coil that needs replacement. If you’re not comfortable testing it yourself, any qualified Lubbock irrigation technician can diagnose it in minutes.
2. Can I replace just the solenoid or do I need a whole new valve? In most cases, you can replace just the solenoid. They are designed to be easily unscrewed and swapped out. You would only need to replace the entire valve if the valve body itself is cracked or the internal diaphragm is damaged beyond repair.
3. What happens if I install the wrong voltage solenoid? Using a solenoid with the wrong voltage rating will cause it to either not function at all or burn out quickly. Always match the replacement solenoid’s voltage (typically 24 VAC for residential irrigation) to your system’s requirements.
4. Can lightning really kill all my solenoids at once? Yes. Lightning induced surges travel through buried irrigation wiring and can destroy every solenoid coil connected to the system in a single event. Installing a surge protector at the controller is the best prevention. After a storm, test all solenoid coils and the controller’s output before replacing anything.
5. How do I tell if the problem is the solenoid or the controller? Test the controller’s output voltage at the terminal strip while manually running the suspect zone. If you see 24 to 28 VAC, the controller is doing its job and the problem is downstream (wiring or solenoid). If you see zero or very low voltage, the controller or its internal components need attention.
6. Is a sprinkler solenoid replacement a good DIY project? For a single valve with a confirmed bad coil, yes. The tools are basic and the process is straightforward. Where things get complicated is when the real problem turns out to be wiring, a bad controller, or a damaged valve body. If one solenoid replacement doesn’t fix the zone, it’s usually time to call a pro.
7. How often do sprinkler solenoids need to be replaced? Solenoids are durable and can last many years. Their lifespan can be affected by water quality (and Lubbock’s water is hard), electrical surges, and extreme weather. There is no set replacement schedule; you typically only perform a solenoid replacement when one fails. Regular maintenance and surge protection can extend their life significantly.
8. Does M&M Sprinklers service areas outside Lubbock? Yes. In addition to Lubbock, M&M serves surrounding West Texas communities including Levelland, Littlefield, Post, Shallowater, Wolfforth, Brownfield, Plainview, and other towns within roughly 20 to 90 miles of the city.