
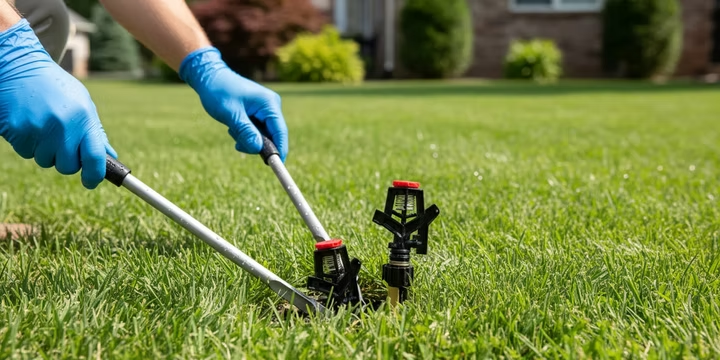
A broken sprinkler head is one of the most common irrigation problems homeowners face. Whether it got clipped by the lawnmower or simply wore out over time, a malfunctioning head leads to brown spots, flooded sidewalks, and wasted water. The good news: you can replace sprinkler head without digging up your lawn in about five minutes with no special tools.
The trick is simple. The sprinkler body stays buried in the ground. You only unscrew and swap the top portion at ground level. No shovel, no sod cutting, no mess.
If you’d rather skip the DIY route, sprinkler repairs in Lubbock from an experienced team can save you time and guesswork.
Before You Start: Quick Prep
A couple minutes of preparation is all you need before the swap.
Step 1: Identify Your Sprinkler Head
Look for a manufacturer name like Rain Bird, Hunter, or Toro stamped on the top or side of the head. Note whether it’s a small pop-up spray head (2 to 4 inches across) or a larger rotor head (5 to 6 inches). Getting the right make and model makes everything easier. If you’re having trouble telling heads apart, a guide to irrigation head types can help narrow it down.
Step 2: Get the Right Replacement
Buy a replacement that matches the original. The three things to match:
- Type: Spray head or rotor. Don’t mix these on the same zone since they water at very different rates.
- Spray pattern: A head in a corner needs a quarter circle (90°), not a half circle (180°). Check what the old one was set to before you remove it.
- Radius: Match the throw distance so water reaches the same area as before.
The easiest approach is to bring the old head (or just the cap) to the hardware store and find an exact match. Most home improvement stores stock Rain Bird, Hunter, and Toro replacements.
Step 3: Shut Off the Water
This step is non-negotiable. Locate your sprinkler system’s main shut-off valve (often near your backflow preventer or water meter) and turn the handle clockwise until it stops. Practitioners on Reddit report “powerful jets” of water blasting out after skipping this step, sometimes flooding a section of the yard in seconds.
If you’re unsure where the valve is or whether your backflow device needs attention, that’s worth checking while you’re at it.
The No-Dig Method: Replace the Sprinkler Head at Ground Level
Here’s why this works without digging. The sprinkler body is threaded onto a riser pipe underground. The top cap and internal parts (the spring, pop-up stem, and nozzle) are designed to be removed and replaced from above, right at ground level. You never need to touch the buried body or the pipe below it.
Step 1: Unscrew the Old Head
Grip the top of the sprinkler head and turn it counterclockwise. That’s it. Most heads unscrew by hand right from ground level.
If the whole body turns with it, that’s fine. Keep unscrewing. The body will eventually separate from the riser fitting below. You can then screw the new body on in its place (same threaded connection, no digging required).
If only the cap comes off, even better. Pull out the internal spring and pop-up stem assembly, drop in the new internals from your replacement, and screw the cap back on. Many popular models, like the Rain Bird 1800 Series, are designed for exactly this kind of swap. Rain Bird even sells replacement cap and seal assemblies that make the fix take seconds.
What If the Head Is Stuck?
Mineral buildup and dirt can freeze the threads, especially in areas with hard water like West Texas. Try these fixes before reaching for a shovel:
- Channel-lock pliers: Gently grip the head and apply firm, steady pressure counterclockwise. Don’t squeeze too hard or you’ll crack the plastic.
- Rock it loose: Tighten a little, then loosen. Repeat. This breaks the mineral seal without forcing anything.
- Penetrating lubricant: Spray a little around the base where the threads meet. Wait five minutes, then try again.
If you’re dealing with a broader system failure beyond a stuck head, check out troubleshooting your sprinkler system for a more complete diagnostic approach.
Installing the New Sprinkler Head
With the old head out, installation takes just a couple minutes.
Step 1: Flush the Line (Don’t Skip This)
This is the step most DIYers skip, and it causes the most problems afterward. With the head removed, dirt and sand can fall into the open pipe. Before installing the new head, flush it out.
Point the open riser away from you and briefly turn the water on for 5 to 10 seconds. This blasts out any debris. Practitioners on YouTube walkthroughs stress that even a small grain of sand can jam a nozzle, particularly the smaller sizes used on spray heads. One irrigation tech described pulling a clogged nozzle from a brand-new head a homeowner had installed just days earlier, all because the line wasn’t flushed first.
Quick flush checklist:
- Stand to the side, not directly over the opening
- Turn water on for 5 to 10 seconds
- Watch for discolored water or visible debris
- Repeat if the water isn’t running clear
- Shut the water off again before installing the new head
If clogs persist after flushing, or if a zone won’t run at all, the issue may be at the valve itself. A sprinkler valve repair guide can help diagnose what’s happening upstream.
Step 2: Screw On the New Head
Thread the new head onto the riser clockwise. Hand-tighten only. Overtightening with a wrench can crack the plastic housing or strip the threads, causing leaks. A snug, hand-tight fit is all you need.
If you’re replacing the entire body (not just the cap), wrap the threads with 3 to 5 turns of Teflon tape before screwing it on. This prevents leaks at the connection.
Step 3: Point It the Right Direction
Before you turn the water back on, set the spray direction:
- Direction: Twist the pop-up stem so the nozzle points toward the area you want to water.
- Arc: For adjustable heads, use a flat-blade screwdriver in the adjustment slot to set the sweep angle. Corner = 90°, border = 180°, open lawn = 360°.
- Radius: Use the small screw on top of the nozzle to control throw distance. Turn it clockwise to shorten the spray, preventing overspray onto sidewalks and driveways.
For a deeper walkthrough on fine-tuning these settings, see how to adjust sprinkler arc and radius.
One common mistake: installing a full-circle nozzle in a corner position. This wastes about 75% of the water by spraying it onto hardscape, fences, and the neighbor’s property. Always match the nozzle pattern to the head’s location.
Finishing Up
You’re almost done. A final check ensures your work was a success.
Step 1: Test for Leaks and Check Coverage
Turn the water on and watch the newly installed head. Check for any water bubbling or seeping from the connection at its base. If you see a leak, turn the water off, remove the head, clean the threads, and reinstall.
Also make sure the head is sitting level and flush with the ground. A tilted head won’t provide even coverage. If it’s too high, it’s a target for the lawnmower. Too low, and the grass will block its spray. If the head sits too low, a riser extension fix can bring it up to the right height without replacing the entire assembly.
Run the zone for a few minutes and walk the area. You’re looking for even coverage with no dry gaps and no overspray onto pavement. If other heads on the same zone seem weaker than before, the replacement nozzle may have a higher flow rate than the original. Swap it for a nozzle that matches what was there before (check the old nozzle for a printed size code, or look up the manufacturer’s specs online).
Want a professional to verify coverage and programming? Schedule a seasonal checkup and let a tech confirm everything is dialed in.
When the No-Dig Method Won’t Work
The no-dig swap works in most situations, but there are a few cases where you’ll need to dig down to the fitting. These are less common, but worth knowing about so you’re not caught off guard.
You’ll need to dig if:
- The buried body of the sprinkler has visible cracks that are leaking water
- The threaded connection at the base is stripped or broken, so a new head won’t thread on
- The riser pipe itself is damaged below the head
- The original head is a discontinued model and nothing currently sold will thread onto the existing fitting
Discontinued heads are a surprisingly common problem. Homeowners with older systems (Toro Super 700, certain Weathermatic models, older K-Rain units) often discover the replacement parts simply aren’t manufactured anymore.
One YouTube installer noted that about 1 in 5 sprinkler head replacements ends up requiring some digging because the homeowner discovers a cracked body or damaged fitting that wasn’t visible from the surface.
If you hit any of these situations, you’ll need to carefully dig around the head (about 6 to 10 inches down) to expose the swing joint or pipe fitting, then unscrew the entire body and install a modern replacement. Use caution around the flexible connectors below the head, as they’re easy to damage if you pry too aggressively.
If you find a cracked lateral pipe or a broken swing joint while digging, the repair has grown beyond a simple head swap. That’s a good time to call a professional rather than risk a bigger problem. The team at M&M Sprinklers has been handling exactly these kinds of discoveries for Lubbock homeowners since 1987.
Frequently Asked Questions
1. Can you really replace a sprinkler head without digging?
Yes. If the buried body is undamaged, you just unscrew the top cap (or the whole head) at ground level, flush the line, and screw on the replacement. No shovel needed.
2. How do I know what kind of sprinkler head to buy?
Look for a brand name and model number on the old head. The easiest approach is to bring the old head or cap to the hardware store and find an exact match. Make sure the spray type (spray or rotor) and pattern (quarter, half, or full circle) are the same.
3. What tools do I need?
For most replacements: just your hands. If the head is stuck, a pair of channel-lock pliers will help. A small flathead screwdriver is useful for adjusting the spray pattern on the new head. That’s the full toolkit.
4. Should I replace just the cap or the whole sprinkler head?
If the buried body is in good condition with no cracks, replacing only the cap and internals is faster and cheaper. If the body is cracked or the threads are stripped, replace the whole head.
5. Why is my new sprinkler head leaking at the base?
Usually the head isn’t tight enough, there’s dirt in the threads, or the threads were crossed during installation. Remove the head, clean the threads, and reinstall hand-tight. For persistent leaks, check our sprinkler head leaking guide.
6. How do I adjust the spray on my new sprinkler?
Most spray heads have a small screw on top to adjust distance (turn clockwise to decrease). The direction is adjusted by twisting the pop-up stem. For rotors and adjustable arc nozzles, use a flat screwdriver in the adjustment slot.
7. How long does this take?
A straightforward no-dig replacement takes about 5 to 10 minutes, including flushing the line and testing. If the head is stuck or you need to troubleshoot the spray pattern, budget 15 to 20 minutes.
8. How do I know if I need to dig?
If the buried body is cracked, the threaded base is stripped, or the original model is discontinued with no compatible replacement available, you’ll need to dig down to the fitting. Otherwise, the no-dig method handles it.
If you’re facing a more complex irrigation issue or need help with a full system checkup, contact M&M Sprinklers for reliable, professional service in the Lubbock and West Texas area.