
TL;DR
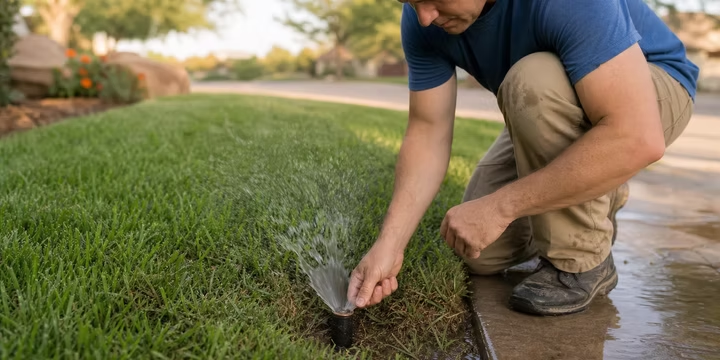
Clogged sprinkler nozzles show up as gaps in the spray pattern, misting, heads that won’t pop up, or stubborn heads that refuse to retract after watering. To clean them, you can start with a quick tap or riser press trick for partial clogs, then move to full disassembly with a vinegar soak for mineral buildup. In hard water areas like Lubbock (where water hardness reaches 22.2 grains per gallon), quarterly nozzle inspections are essential to keep your system running efficiently.
Why Clogged Nozzles Are Such a Common Problem in West Texas
A clogged sprinkler nozzle is exactly what it sounds like: debris, minerals, or other material blocking the small openings that distribute water across your lawn. The blockage disrupts the spray pattern, wastes water, and creates brown spots that get worse as summer temperatures climb.
This problem hits West Texas homeowners harder than most. Lubbock’s water is classified as “very hard” at approximately 22.2 grains per gallon, well above the 10.5 GPG threshold where water qualifies as “very hard.” That mineral-rich water flows through limestone deposits on its way to your tap, carrying calcium and magnesium that slowly coat the inside of your sprinkler nozzles, narrowing the openings that are supposed to distribute water evenly. Add in the sandy, caliche soil that shifts around buried lateral lines, and you have a recipe for clogs that other regions simply don’t face at the same rate.
Knowing how to identify clogged sprinkler nozzles and clean them saves money, protects your lawn, and prevents the frustration of calling for a repair that turns out to be a five-minute fix. If you suspect broader issues beyond just nozzle clogs, start by checking your sprinkler system top to bottom.
Key Terms You Need to Know
Before you start diagnosing and cleaning, a quick vocabulary lesson saves confusion.
Nozzle
The removable tip that screws onto the top of the sprinkler body and shapes the water into a specific spray pattern (fan, stream, or rotating arc). This is the part that clogs most often.
Filter Screen
A small mesh basket or cylinder that sits inside the sprinkler body, just below the nozzle. Its job is to catch debris before it reaches the nozzle orifice. When the filter screen clogs, flow drops across the entire head.
Riser (Pop-Up Stem)
The internal shaft that rises out of the sprinkler body when water pressure is applied. On pop-up heads, the riser carries the nozzle upward to spray height and retracts when the zone shuts off.
Wiper Seal
A rubber gasket around the riser that prevents dirt from entering the sprinkler body as the stem moves up and down. A worn wiper seal lets soil and sand inside, accelerating clogs.
Spray Body (Housing)
The canister permanently installed in the ground that holds the riser, filter screen, and nozzle assembly. Spray bodies themselves rarely clog, but debris can accumulate inside them.
Back Siphonage
When water drains to the lowest head in a zone after the valve closes, it can create a siphon effect that pulls dirt and sand backward into the nozzle. This is one of the sneakier causes of recurring clogs.
Precipitation Rate
The rate at which a nozzle applies water to the ground, measured in inches per hour. Clogged nozzles drop precipitation rates unevenly, creating dry spots even when runtime seems adequate.
PRS (Pressure-Regulated Spray) Body
A spray body with a built-in pressure regulator that maintains consistent output pressure. PRS bodies reduce misting and improve distribution, but they don’t prevent clogs from debris or minerals.
How to Identify a Clogged Sprinkler Nozzle
The single most reliable diagnostic method is simple: turn on each zone and walk it. Watch every head from start to finish. Here’s what to look for.
Gaps in the Spray Pattern
The most common sign. A properly functioning nozzle produces a smooth, uniform fan or arc of water. When part of the nozzle is blocked, you’ll see a visible gap, a section where water simply isn’t reaching the ground. Sometimes the only sign of a clogged nozzle or filter is this gap in the spray pattern, and it’s easy to miss if you don’t physically walk each zone.
Misting Instead of Spraying
When a nozzle is partially blocked, water gets forced through a smaller opening at higher velocity. Instead of a clean spray, you get a fine mist that evaporates before it ever reaches the grass. On a hot Lubbock afternoon, misting heads might as well be turned off.
Head Won’t Pop Up or Release Water
A fully clogged nozzle or filter screen can prevent enough pressure from building to push the riser up. The zone runs, but the head just sits there. This symptom is easy to confuse with a broken head or a valve issue, so check other heads on the same zone first. If they’re working fine, the problem is almost certainly at the individual head.
Erratic Spray or Failure to Retract
Clogged heads sometimes spray in unpredictable directions, or they rise but produce only a weak dribble. Another telltale sign: the head pops up during the cycle but fails to retract when the zone shuts off. Debris wedged in the riser assembly prevents it from sliding back down smoothly.
Partial Clogs That Hide in Cool Weather
This one catches people off guard. A sprinkler system with a partially clogged nozzle might appear to work fine during cooler weather, when your lawn needs less water. Once temperatures rise and water demand increases, that same partial blockage becomes obvious as brown patches appear. If you notice dry spots only in July and August, a partial clog from spring could be the culprit.
The Critical Misdiagnosis: Clog vs. Low Pressure vs. Broken Head
Not every weak spray pattern is a clog. There are several reasons for inconsistency, including misaligned heads and pressure problems. Before you disassemble anything, run a quick differential diagnosis.
If multiple heads on the same zone are weak: The problem is probably low pressure or a valve issue, not individual clogs. You can troubleshoot low water pressure as a separate step.
If only one or two heads are affected: That points to a localized clog, a cracked head, or a head that’s sunk below grade.
If the head is visibly cracked or damaged: That’s not a clog. That’s a replacement job.
An irrigation practitioner from Katy, TX noted that half the “bad head” service calls they receive turn out to be a clogged nozzle, a head that sank a little, or one that just needs aiming. These are fixes that cost a few dollars or nothing at all.
What Causes Sprinkler Nozzle Clogs
Understanding the root cause matters because it determines whether cleaning is a one-time fix or a recurring chore.
Dirt, Sand, and External Debris
Small pebbles, sand grains, and grass clippings are the most common offenders. They enter the system through damaged wiper seals, during head replacements, or after line repairs when pipe fragments get left behind. In West Texas, the sandy soil makes this especially persistent.
Hard Water Mineral Deposits
Hard water carries calcium and magnesium that leave white, chalky deposits (limescale) on sprinkler heads and inside nozzle orifices. Over time, these deposits narrow the openings and reduce flow. In Lubbock, this is one of the most common reasons homeowners need sprinkler repair. The minerals also pit valve seats over time, creating sealing failures that compound the problem.
Back Siphonage
When a zone shuts off, water remaining in the lateral lines drains to the lowest head. That draining water can pull dirt and sand backward into the nozzle. If the same head keeps clogging despite cleaning, back siphonage is a likely suspect.
Heads Set Below Grade
Sprinkler heads that have sunk below the soil surface are far more likely to clog. Every time the riser pops up, it pushes through a layer of dirt that gets pulled inside the body.
Insect Nesting
Practitioners report finding insect activity inside sprinkler heads, especially in dormant or less frequently used zones. Spiders, ants, and mud wasps can build nests that block nozzle openings. This is more common in side yards and zones that only run seasonally.
Water Source Quality
City water contributes mineral buildup on screens and internal components. Well systems may introduce rust, iron, and sediment. Reclaimed water often carries higher levels of organic debris. Each source creates a different type of clog that requires a different cleaning approach.
Caliche Soil Compression
Unique to regions like West Texas: caliche soil shifting around buried lateral lines can compress sections of pipe and restrict flow to individual zones. This isn’t technically a nozzle clog, but it mimics one and is worth investigating if cleaning the nozzle doesn’t solve the problem. For more on related issues, see this guide on common sprinkler system issues.
Nozzle Type Matters
Not all nozzles clog at the same rate. Here’s how the three main types compare:
Hunter’s MP Rotator line includes a double-pop feature that helps protect the nozzle from debris. That said, owners who run MP Rotators in hard water areas report that the tight internal tolerances can make them more susceptible to calcium deposits over extended runtime. No nozzle type is clog-proof in Lubbock’s water.
How to Clean a Clogged Sprinkler Nozzle: Three Levels
Once you’ve confirmed a clog, the cleaning approach depends on severity. Start with Level 1 and escalate if needed.
Level 1: Quick Field Fix (Partial Clogs)
These tricks work when the nozzle is only partially blocked with sand or light debris.
The tap trick: If a fixed spray nozzle has a partial clog, lightly tap the top with the back of a screwdriver while the zone is running. The vibration can break loose sand or fine debris and restore the spray pattern. This is a temporary fix, but it confirms the problem is a clog.
The riser press trick: Practitioners on lawn care forums share this method regularly. Turn on the zone, then use your foot to firmly press the riser all the way down into the body. Let it pop back up. Repeat this four or five times. The surge of water often flushes out sand or debris wedged between the riser and cap. If the spray pattern improves, you’ve just saved yourself a disassembly job.
Level 2: Standard Cleaning (Moderate Clogs)
When the quick fixes don’t work, it’s time for full disassembly. Here’s the process step by step:
- Turn off the system. Shut down the zone at the controller or turn off the main water supply.
- Pull up and clamp the stem. Lift the riser out of the body by pulling up on the nozzle with your fingers or a pair of reverse pliers. Hold or clamp the stem to keep it extended.
- Remove the nozzle and filter screen. Unscrew the nozzle from the top of the riser. Pull the filter screen out of the stem. On most Hunter and Rain Bird heads, the filter screen lifts straight out.
- Rinse the filter and nozzle. Wash debris from both parts in a small cup of clean water. For stubborn particles stuck in the nozzle orifice, use a thin wire, bent paperclip, or old toothbrush to clear the openings.
- Flush the line. With the nozzle still removed, turn the water supply back on for 20 to 30 seconds. This flushes debris from the lateral line that would otherwise immediately re-clog your clean nozzle. If you want a deeper look at head maintenance, the Hunter sprinkler head repair guide covers brand-specific details.
- Reassemble and test. Replace the filter screen, screw the nozzle back on, and run the zone to verify a clean spray pattern.
Level 3: Mineral Deposit Deep Clean
For the white, crusty buildup that’s common with hard water, a simple rinse won’t cut it. You need a chemical soak.
Vinegar soak (standard mineral deposits): Soak the nozzle and filter screen in a 50/50 white vinegar and water solution for 15 to 30 minutes. For heavy calcium buildup, extend the soak to 30 to 60 minutes. Scrub remaining deposits gently with a soft brush or old toothbrush.
CLR or rust remover (iron buildup): For orange or reddish deposits from well water, fill a freezer bag half full of CLR Calcium, Lime, and Rust Remover. Drop the nozzle and filter in, swish occasionally, and remove after 30 minutes. Rinse thoroughly in clean water.
Citric acid alternative: DIY irrigation communities share a practical workaround: dissolve citric acid powder in warm water for an effective, gentler mineral soak. If you don’t have citric acid on hand, a few packets of unsweetened lemonade-flavored Kool-Aid contain enough citric acid to do the job. This is a real tip from The Lawn Forum that no major ranking article mentions, and multiple users confirm it works well on moderate calcium deposits.
Post-cleaning protection: After cleaning, spray the parts lightly with silicone lubricant. This lubricates the moving parts and creates a barrier that slows future mineral buildup.
What NOT to Use
WD-40: It’s a solvent, not a lubricant, and it degrades plastic and rubber components in sprinkler heads. Clean with water and vinegar instead.
Harsh chemical cleaners: Bleach, drain cleaner, or industrial degreasers can cause corrosion and premature deterioration of internal components.
Abrasive scrubbers: Steel wool or aggressive scouring pads can scratch the precision-machined nozzle orifice, permanently altering the spray pattern.
If you’d rather see the full nozzle replacement process, this step-by-step nozzle replacement guide walks through it from start to finish.
When to Clean vs. When to Replace
Cleaning is always worth trying first. A new nozzle costs $3 to $9, and a full replacement head costs more, so there’s clear financial incentive to clean when possible. But replacement makes more sense when:
- The nozzle keeps clogging despite repeated cleaning (this signals a systemic issue, not just a dirty part)
- Visible cracks in the nozzle or spray body
- The head won’t retract properly even after cleaning
- The system is over 15 years old (at that point, replace all heads in a zone at once)
- Sand or dirt has damaged the wiper seal, which means debris will keep entering the body regardless
Quality sprinkler heads last 10 to 20 years under normal conditions, but hard water and sandy soil can shorten that lifespan significantly.
Wondering what professional help might run? The sprinkler repair cost guide breaks down typical pricing for common fixes, including head and nozzle work.
How to Prevent Nozzle Clogs
Cleaning a clogged nozzle is straightforward. Preventing the next clog takes a little routine maintenance.
Monthly Visual Walkthrough
Walk your yard once a month during the watering season and run each zone while you watch. Look for gaps, misting, heads that don’t pop up, and heads that don’t retract. This five-minute habit catches problems before they kill your grass.
Seasonal Line Flushes
At the start and end of the watering season, run the system with all nozzles removed. Let water flow through each zone for 20 to 30 seconds. This flushes accumulated debris from the lateral lines before it reaches your nozzles.
Keep Heads Clear
Grass, mulch, and soil buildup around sprinkler heads restrict spray patterns and push debris into the body when the riser moves. Trim grass and clear mulch around each head regularly.
Quarterly Nozzle Inspection for Hard Water Areas
Hunter Industries’ maintenance documentation recommends quarterly visual inspection of nozzle orifices in hard water regions. Given Lubbock’s water hardness, this is sound advice. Pull the nozzle, check for white buildup, and do a quick vinegar soak if you see any scaling.
Choose Less Clog-Prone Nozzles
If you’re replacing nozzles anyway, consider switching from adjustable spray nozzles to fixed or rotary types. Fixed nozzles have simpler internal passages, and rotary nozzles like the Hunter MP Rotator have larger flow paths that resist debris accumulation. For a bigger-picture approach to reducing water waste and maintenance headaches, the guide on making your sprinkler system more efficient covers nozzle selection alongside other upgrades.
Smart Flow Monitoring
Modern smart irrigation controllers with flow sensors can detect clog-related flow drops automatically. If the controller measures lower-than-expected flow on a zone, it flags the issue and alerts you. For spray heads running at 12 GPM, even a small flow reduction can indicate filter clogging. This kind of proactive detection is the future of irrigation maintenance. Learn more about how flow monitoring detects hidden problems in irrigation systems.
When to Call a Professional
Most single-nozzle clogs are genuine DIY territory. But certain situations call for professional help:
- Recurring clogs after cleaning. A properly functioning irrigation system should run clean. If nozzles are clogging repeatedly, it’s a sign of a larger system issue, not just a bad part. Line debris, water quality problems, or back siphonage need professional diagnosis.
- Multiple zones affected simultaneously. When clogs appear across several zones at once, the problem is upstream of the nozzles, possibly at the backflow preventer, main line, or water supply.
- You can’t identify the source. If cleaning the nozzle doesn’t fix the spray pattern, the issue might be low pressure, a failing valve, or a compressed lateral line.
- You need a system flush, pressure testing, or nozzle upgrades. These involve working with the entire system, not just individual heads.
For Lubbock and West Texas homeowners who want ongoing protection, a maintenance plan that includes nozzle cleaning and seasonal system flushes takes the guesswork out of prevention entirely.
Frequently Asked Questions
How often should I check sprinkler nozzles for clogs?
Check and clean your sprinkler heads at least once a month during the watering season. In hard water areas like Lubbock, do a deeper inspection with nozzle removal quarterly. Hunter Industries specifically recommends this frequency for regions with elevated mineral content.
Can I use bleach to clean sprinkler nozzles?
No. Harsh chemical cleaners like bleach can corrode internal components and degrade rubber seals. Stick to white vinegar (50/50 with water) for mineral deposits, or CLR for iron and rust buildup. Citric acid dissolved in warm water is another effective option.
Why does only one sprinkler head have a weak spray while the rest are fine?
A single weak head on an otherwise normal zone almost always points to a clogged nozzle or filter screen at that individual head. It could also be a head that has sunk below grade. If the head is visibly cracked, it needs replacement rather than cleaning.
What’s the difference between a clogged nozzle and low water pressure?
A clogged nozzle affects one or two heads on a zone, creating gaps or misting at specific locations. Low pressure affects every head on the zone equally, producing universally weak spray. If all heads on a zone are underperforming, the problem is likely pressure-related, not a clog.
How long should I soak nozzles in vinegar?
For standard mineral deposits, 15 to 30 minutes in a 50/50 vinegar and water solution is sufficient. For heavy calcium buildup common in West Texas, extend the soak to 30 to 60 minutes. Scrub remaining deposits with a soft brush after soaking.
Do rotary nozzles clog less than spray nozzles?
Generally, yes. Rotary nozzles have larger internal flow paths compared to fixed or adjustable spray nozzles. Some models, like Hunter’s MP Rotator, include built-in debris-clearing features. However, no nozzle type is immune to calcium buildup in hard water areas.
When should I replace a nozzle instead of cleaning it?
Replace the nozzle if it clogs repeatedly despite thorough cleaning, if you see visible cracks, if the spray pattern remains distorted after cleaning, or if the head is part of a system older than 15 years. At $3 to $9 per nozzle, replacement is inexpensive insurance.
Can insects really clog sprinkler nozzles?
Yes. Spiders, ants, and mud wasps commonly nest inside sprinkler heads, especially on zones that run infrequently or go dormant for part of the year. A monthly visual inspection catches these before they block flow.