
TL;DR
Sloped yards fight gravity every time you water, causing runoff at the top and soggy puddles at the bottom. Designing irrigation for sloped yards requires specific techniques like cycle-and-soak scheduling, check valves, pressure-compensating emitters, and separate zones for each elevation tier. In West Texas, where caliche soil and constant wind make slopes even harder to irrigate, these principles aren’t optional.
Why Sloped Yards Need Different Irrigation Thinking
Turn on a sprinkler system on flat ground, and water soaks in more or less evenly. Do the same thing on a slope, and gravity takes over. Water runs downhill before the soil can absorb it, leaving the hilltop dry and the bottom waterlogged. This pattern, repeated across hundreds of watering cycles each year, erodes soil, starves plants at the crest, and drowns roots at the base.
The physics are simple. The solutions are not.
Designing irrigation for sloped yards means working against gravity at every stage: choosing the right hardware, grouping zones by elevation, programming controllers to apply water slowly, and selecting emitters that perform consistently despite pressure differences. Each of those steps involves specialized terminology that most homeowners have never encountered.
This guide defines every key term you’ll run into when researching slope irrigation, explains why each concept matters, and tells you what to look for (or what to ask your contractor about). If you’re new to how sprinkler systems work, start there first.
For Lubbock and West Texas homeowners, the stakes are higher. The region’s alkaline soils (pH 7 to 8.5), stubborn caliche layers, and relentless wind amplify every slope irrigation problem. Water is too valuable here to let it run off into the street.
Slope Measurement and Classification
Before you can design irrigation for a sloped yard, you need to know how steep it actually is. Slope is measured as a percentage: rise divided by run, multiplied by 100. If a section of your yard rises 3 feet over a horizontal distance of 30 feet, that’s a 10% slope.
A practical three-tier classification helps determine what kind of irrigation you need:
Mild slope (under 10%). Standard sprinklers usually work with minor adjustments. You might need cycle-and-soak scheduling on clay soils, but the hardware itself doesn’t require major changes.
Moderate slope (10% to 25%). Specialized techniques become necessary. Separate zones for upper and lower sections, rotary nozzles with slow application rates, and check valves on every head are standard practice.
Steep slope (over 25%). Drip irrigation is strongly recommended. Texas A&M’s High Plains Water District guide classifies these as “High Slope” areas that are “difficult to irrigate without runoff or causing erosion.”
Most Lubbock yards look flat at first glance, but subtle grades around foundations, planting beds, and drainage swales can still create significant problems. An elevation change of less than 12 inches between heads is enough to trigger low-head drainage.
Runoff: The Core Problem on Slopes
In irrigation, runoff means water flowing across the soil surface instead of soaking in. On flat ground with loamy soil, runoff only happens if you water far too long. On slopes, it starts almost immediately because gravity pulls water downhill faster than the soil can absorb it.
The problem gets worse in compacted and clay soils. The City of Frisco, Texas, found that on their local clay soils, spray zones produce runoff after just six minutes of continuous watering. In Lubbock, where caliche acts like a concrete layer underground, that window can be even shorter. Water hits the caliche and has nowhere to go vertically, so it follows the slope instead.
Runoff wastes water, erodes topsoil, and creates puddles that breed mosquitoes and rot plant roots. If you notice signs of a drainage problem like standing water at the bottom of a grade, runoff from your irrigation system is a likely culprit.
Understanding your soil composition is the first step toward solving runoff. Soil testing through the Texas A&M lab reveals your soil’s infiltration rate, which directly determines how long each irrigation cycle can run before water starts sheeting off.
Cycle and Soak: The Single Most Important Technique
Cycle and soak is the practice of splitting a zone’s total watering time into multiple short runs separated by pause periods. Instead of running a zone for 15 minutes straight (which guarantees runoff on any slope with clay soil), you run it for 3 to 5 minutes, pause for 15 to 20 minutes while the water soaks in, then repeat until you’ve delivered the full amount.
This is the most frequently recommended technique across every professional resource on slope irrigation. It appears in Rain Bird’s professional guidelines, Texas A&M Extension publications, and practitioner forums alike.
Practical Numbers
A common starting point is the “30-30 rule” popularized by irrigation retailers: water for 30 minutes total, but break it into cycles with 30-minute soak periods between them. For slopes, the cycles should be much shorter. Practitioners on irrigation forums recommend 2 to 5 minute runs with 15 to 20 minute pauses, adjusting based on your soil type and slope steepness.
On Lubbock’s alkaline clay and caliche soils, err toward the shorter end. If six minutes produces runoff on North Texas clay (as documented by the City of Frisco), start with three-minute cycles and adjust from there.
Smart Controller Connection
Modern controllers automate cycle and soak so you don’t have to program multiple start times manually. The Hunter X2 with Hydrawise, for example, lets you enter a maximum cycle time and minimum soak time for each individual station. The controller then automatically divides the total runtime into cycles. If you set a 15-minute total run with a 3-minute cycle and 20-minute soak, the controller will run the zone for 3 minutes, move on to other zones during the soak period, then return to finish. Practitioners on The Lawn Forum confirm this works as expected in real-world use.
Low-Head Drainage: The Hidden Water Waster
Low-head drainage happens when water remaining in the pipes after a zone shuts off drains out through the lowest sprinkler heads by gravity. The water in the higher pipes flows downhill, exits through the low-point heads, and gets replaced by air. This creates two problems: wasted water pooling at the base of the slope, and air-filled pipes that sputter and spit when the zone turns on again.
The symptoms are distinctive. If your sprinkler heads spit air and spew water chaotically for the first 10 to 30 seconds every time a zone starts, you almost certainly have low-head drainage. You’ll also notice soggy spots around the lowest heads in each zone, even hours after the system has stopped running.
Here’s what surprises most homeowners: the slope doesn’t need to be steep. An elevation change of less than one foot between the highest and lowest heads in a zone is often enough to cause low-head drainage. This means even “flat” yards with subtle grading can have the problem.
Low-head drainage looks similar to a leaking valve but has a different cause and fix. If your system is gushing water when turned off, low-head drainage is one of several possibilities worth investigating.
Check Valves, Anti-Drain Valves, and SAM Heads
The fix for low-head drainage is a check valve: a small spring-loaded device inside the sprinkler head or installed inline that prevents water from flowing backward through the pipe. When the system is pressurized, the check valve opens and water flows normally. When the system shuts off and pressure drops, the spring closes the valve and holds the water in the pipes.
You’ll encounter three terms that all describe related devices:
Check valve. The general term for any device that prevents reverse flow in a pipe.
Anti-drain valve. Same concept, specifically marketed for preventing low-head drainage in sprinkler systems.
SAM head. Short for Seal-A-Matic. This is Hunter Industries’ brand name for sprinkler bodies with built-in check valves. Practitioners on Reddit’s r/Irrigation forum consistently recommend SAM heads as “must-haves” for sloped yards. The term has become almost generic in the trade, similar to how people say “Kleenex” when they mean tissue.
Built-In vs. Inline: Know the Limits
Most modern pop-up sprinkler bodies offer optional built-in check valves. These are convenient and usually sufficient for mild slopes. However, professionals on the LawnSite forum point out a critical limitation: “the pro sprays we use will only hold back 10 feet of head.” In other words, built-in check valves handle about 10 feet of elevation difference. If your slope is steeper, you’ll need inline check valves with higher pressure ratings installed in the pipe before the heads.
According to the Irrigation Association, check valves can reduce water waste by up to 20% per zone on sloped or uneven terrain. For a detailed walkthrough on installation, see our check valve installation guide.
Pressure-Compensating Emitters
This term applies specifically to drip irrigation. A pressure-compensating (PC) emitter contains a flexible silicone membrane that adjusts automatically to maintain a consistent flow rate regardless of water pressure changes.
Why does this matter on slopes? Water pressure increases with depth. At the bottom of a slope, there’s more pressure pushing water through the emitter than at the top. Non-compensating emitters simply pass through whatever pressure they receive, so the bottom of your slope gets flooded while the top stays dry.
PC emitters, by contrast, produce the same flow rate across a wide pressure range (typically 10 to 55 PSI). Whether an emitter sits at the top of a 30-foot slope or at the bottom, it delivers the same volume per hour. This is non-negotiable for drip irrigation on any slope.
Non-pressure-compensating drip hose is not suitable for use on steep or non-uniform terrain. When shopping for drip supplies or reviewing a contractor’s material list, confirm that every emitter and dripline is labeled “pressure-compensating” or “PC.”
Matched Precipitation Rate (MPR)
Matched precipitation rate means every sprinkler head in a zone applies water at the same rate, measured in inches per hour. This sounds obvious, but it’s easy to violate when different heads in the same zone have different arc patterns (quarter circle, half circle, full circle) or different radius settings.
A full-circle head covers twice the area of a half-circle head, so it naturally applies water at half the rate per square foot, unless the nozzle compensates. If you mix unmatched heads in the same zone, some areas get soaked while others stay dry.
On flat ground, this is annoying. On slopes, it’s dangerous. The overwatered sections produce runoff and erosion, while the underwatered sections dry out and lose plant cover, which causes more erosion. MPR nozzle sets are designed to deliver uniform precipitation regardless of arc and radius variations, and they should be standard practice in any slope irrigation design.
Rotary Nozzles and MP Rotators
Standard spray heads apply water at roughly 1.5 to 1.6 inches per hour. That’s faster than most clay soils can absorb, even on flat ground. On a slope, it’s a recipe for instant runoff.
Rotary nozzles (the Hunter MP Rotator being the most common example) solve this by applying water at 0.4 inches per hour for steep slopes and 0.8 inches per hour for gentle slopes. That’s roughly four times slower than a standard spray head, giving the soil dramatically more time to absorb water before gravity carries it away.
The tradeoff is longer run times. A zone that took 10 minutes with spray heads might need 35 to 40 minutes with rotary nozzles. But because the water actually soaks in instead of running off, you use less total water and get better results. For homeowners looking to make their system more efficient, swapping to rotary nozzles on sloped zones is one of the highest-impact changes available.
Low-Angle Nozzles
Standard sprinkler nozzles launch water at about a 25-degree angle. Low-angle nozzles reduce that trajectory to roughly 13 degrees. The difference matters in two situations: slopes and wind.
On a slope, a high trajectory sends water arcing upward before it falls back down. If the head sits at the top of a grade, much of that water overshoots the intended area and lands at the bottom. A low-angle nozzle keeps the stream closer to the ground, improving accuracy.
In Lubbock, wind is the bigger factor. The city averages sustained winds of 12 to 14 mph with frequent gusts above 25 mph. Higher trajectories create more airborne time for droplets, and wind pushes fine mist off target. Practitioners on the SprinklerTalk forum note that low-angle nozzles “are used on slopes when the heads sit atop a riser” and should not be used on flat lawns where the low trajectory would hit obstacles.
When designing irrigation for a sloped yard in West Texas, low-angle nozzles address both slope accuracy and wind drift with a single hardware change.
Pressure Regulation
On a sloped yard, heads at the top of the grade experience lower water pressure than heads at the bottom, simply because gravity assists the flow downhill. This pressure difference causes two problems: heads at the top may underperform (weak streams, poor coverage), while heads at the bottom may operate at excessive pressure, producing fine mist that drifts in the wind and compacts soil.
Pressure-regulating devices maintain uniform pressure across all heads in a zone regardless of elevation. They’re installed either at individual heads (pressure-regulated stems) or at the zone valve.
Hunter’s technical notes explain that lower pressures increase droplet size while higher pressures produce smaller droplets susceptible to wind drift. The goal is a sweet spot where droplets are large enough to resist wind but not so large they compact soil and cause runoff.
If you’re already troubleshooting low water pressure in your system, know that elevation changes between heads within a zone might be the cause rather than a supply-side problem.
Zone Design by Elevation
Proper zone design is the foundation of how to design irrigation for sloped yards. The principle is straightforward: group heads at similar elevations together on the same zone, so each zone can be programmed independently.
A slope should be divided into at least three zones: uphill, mid-slope, and downhill. Each zone gets its own runtime, cycle-and-soak settings, and potentially different head types. The uphill zone might need longer total runtime because water drains away from roots quickly. The downhill zone might need shorter, more frequent cycles because water accumulates there naturally.
Within each zone, avoid mixing full-circle and part-circle sprinklers unless you’re using MPR nozzles that compensate for the difference. Keep zone boundaries roughly parallel to the contour of the slope (horizontal lines across the hill, not vertical lines running up and down it).
This zoning approach also matters for trees on slopes. Roots at the hilltop tend to dry out while roots at the bottom can drown. If you have mature trees on a grade, coordinating irrigation with tree health ensures you’re not slowly killing a tree by overwatering or underwatering one side of its root zone.
Drip Irrigation on Slopes
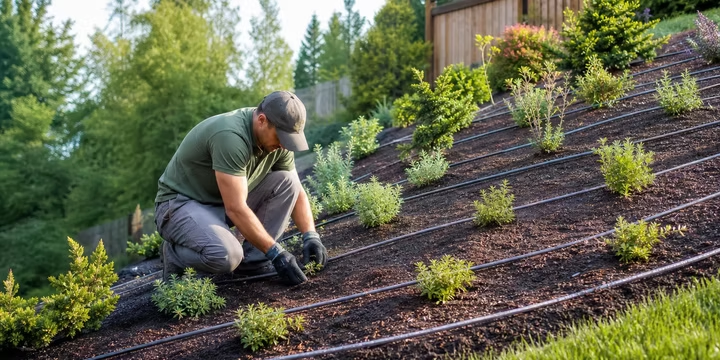
For slopes steeper than about 25%, and for planting beds on any slope, drip irrigation is the best option. It delivers water slowly and directly to the root zone, producing almost zero runoff. There’s nothing for gravity to pull downhill because the water enters the soil right where it exits the emitter.
Layout Principles
Always run lateral driplines horizontally across the contour of the slope, not up and down. This ensures each row of emitters sits at roughly the same elevation, which minimizes pressure differences between emitters on the same line. Multiple sources, including the HydroPoint guide that ranks in the top three for this topic, emphasize this contour-line principle as essential.
Space rows evenly to achieve uniform soil saturation. On clay soils, water spreads laterally more than it does on sandy soils, so rows can be spaced slightly farther apart. On Lubbock’s caliche-underlain soils, expect very limited downward penetration, making tight row spacing and slow emitter rates even more important.
Always specify pressure-compensating dripline and emitters. This is repeated here because it’s that important: non-PC drip products simply don’t work on slopes.
For a deeper comparison of drip versus spray systems, see our drip irrigation vs. sprinkler guide.
Moisture Sensor Placement on Slopes
A single moisture sensor in a sloped yard gives misleading readings. If it’s placed at the bottom, it reads wet and tells the controller to skip irrigation, while the hilltop bakes. If it’s placed at the top, it reads dry and triggers excessive watering that floods the base.
Hunter’s technical guidance recommends installing one moisture sensor for each zone, or at minimum one for each horizontal row of lateral driplines. On a three-zone slope (uphill, mid, downhill), that means three sensors, each reporting the actual conditions for its own elevation band.
This is a detail that almost no consumer-facing irrigation content covers, but it’s critical for accurate smart controller operation. Without zone-specific moisture data, even the best controller is making decisions based on bad information.
Smart Controllers and Weather-Based Scheduling
Smart irrigation controllers connect to local weather data and adjust watering schedules automatically. On a slope, this matters because evapotranspiration rates, wind exposure, and sun angles can vary dramatically between the top and bottom of a grade. A south-facing hilltop in Lubbock bakes in direct sun and drying wind; the north-facing base stays cooler and retains moisture longer.
A weather-based controller with zone-specific cycle-and-soak programming handles this automatically. The Hydrawise platform, for example, lets you set different cycle times and soak times for each individual station, then adjusts total runtimes up or down based on weather. One station might run three 5-minute cycles with 20-minute soaks on a hot, windy day, while a shaded zone at the base of the slope runs two 4-minute cycles with 15-minute soaks.
The system also provides flow monitoring that can detect line breaks or clogged emitters, which are more common on slopes where soil shifting and erosion stress pipes and fittings.
West Texas Soil Conditions and Wind
No discussion of how to design irrigation for sloped yards is complete without addressing site-specific soil and climate. In Lubbock and across West Texas, three conditions make slope irrigation harder than it is in most other regions.
Caliche. This dense, calcium-carbonate layer sits anywhere from a few inches to a few feet below the surface. It’s essentially rock. Water can’t penetrate it, so on a slope with shallow caliche, the entire soil profile above it saturates quickly and then sheds water downhill. Cycle-and-soak intervals need to be shorter, and drip irrigation becomes the default recommendation for anything steeper than a mild grade.
Alkaline clay. With pH levels between 7 and 8.5, West Texas soils tend toward tight clay that swells when wet and cracks when dry. The infiltration rate is slow, and the surface crusts over between waterings, further reducing absorption. The six-minute runoff threshold documented for North Texas clay soils is a reasonable upper limit for spray zones here too.
Wind. Lubbock is one of the windiest cities in the continental U.S. High wind speeds shred spray patterns, push mist off-target, and dramatically increase evaporation from exposed sprinkler streams. Low-angle nozzles, pressure regulation, and morning watering schedules (before winds peak in the afternoon) all help. Drip irrigation, which keeps water at ground level, is inherently wind-resistant.
Erosion Control and Irrigation: Working Together
Irrigation on a slope shouldn’t work in isolation from erosion control measures. Some practitioners argue (and with good reason) that terracing or regrading a slope is always preferable to fighting gravity with irrigation alone. A garden design practitioner on Substack made the point that irrigation should complement good site preparation, not compensate for bad grading.
Ground cover plantings, terracing, and mulch all reduce the velocity of surface water, giving irrigation more time to soak in. If your slope is bare dirt or thin turf, even perfect irrigation design will struggle. Consider these structural elements as part of the design, not as separate projects.
Tree Root Zones on Slopes
Trees planted on slopes present a unique irrigation challenge. The uphill side of the root zone dries out quickly as water drains away, while the downhill side stays perpetually moist. Over time, this asymmetric moisture pattern encourages roots to grow predominantly downhill, which can destabilize the tree.
Proper irrigation design accounts for this by placing emitters or heads to favor the uphill side of the root zone. Deep-root watering methods can deliver moisture directly into the dry zone without adding surface water that just runs downhill. If you have valuable trees on a slope, this is another reason to coordinate irrigation with professional tree care.
When to Call a Professional
Irrigating a flat yard with uniform soil is a reasonable DIY project. Designing irrigation for a sloped yard is not, at least not if you want it to work properly.
Slope irrigation involves hydraulic calculations (pressure changes per foot of elevation), soil infiltration testing, zone mapping, and equipment selection where the wrong choice wastes water for years. The most common DIY mistakes on slopes include mixing head types with different precipitation rates, skipping check valves, running dripline vertically instead of on the contour, and setting run times based on flat-yard assumptions.
A qualified irrigation specialist will measure slope grades, test soil infiltration rates, calculate pressure differentials, select appropriate hardware, and program the controller with zone-specific cycle-and-soak settings. If you’re evaluating contractors, here’s a list of questions to ask an irrigation specialist before signing a contract.
Slope systems also need ongoing seasonal adjustments. What works in July’s heat doesn’t apply in October. A maintenance plan with seasonal programming keeps your slope irrigation tuned correctly year-round instead of running on set-it-and-forget-it schedules that waste water half the year.
Frequently Asked Questions
What is the best irrigation system for a steep slope?
Drip irrigation with pressure-compensating emitters, laid out in horizontal rows across the contour of the slope. It applies water slowly enough that virtually nothing runs off, and PC emitters ensure uniform output from top to bottom. For slopes over 25%, drip is the clear first choice.
How do I stop water from running off my sloped lawn?
Use cycle-and-soak scheduling: run each zone for 3 to 5 minutes, pause for 15 to 20 minutes, then repeat. Switch to rotary nozzles (0.4 in/hr application rate) instead of standard sprays (1.5+ in/hr). Install check valves on every head to prevent low-head drainage. These three changes together eliminate most slope runoff.
What is low-head drainage and how do I fix it?
Low-head drainage is gravity pulling residual water out of the pipes through the lowest sprinkler heads after the zone shuts off. You’ll see heads spitting air when zones start and soggy spots around the lowest heads. The fix is installing check valves (or SAM heads) at every sprinkler body in the zone.
Do I need separate irrigation zones for different parts of a slope?
Yes. Uphill, mid-slope, and downhill sections should be on independent zones with their own runtimes and cycle-and-soak settings. This lets you deliver more water where it drains away quickly (the top) and less where it accumulates naturally (the bottom).
Can a smart controller help with slope irrigation?
Absolutely. Controllers with built-in cycle-and-soak features (like the Hunter X2 with Hydrawise) automate the short-run, pause, repeat pattern for each zone individually. They also adjust total runtimes based on weather data, which prevents overwatering during cool or rainy periods when slopes are especially vulnerable to runoff.
Why does Lubbock’s soil make slope irrigation harder?
Lubbock soils are alkaline (pH 7 to 8.5) and frequently underlain by caliche, a dense calcium-carbonate layer that blocks downward water movement. When water can’t percolate through caliche, it follows gravity across the surface. This makes cycle-and-soak intervals and drip irrigation even more critical here than in regions with deeper, loamier soils.
What are SAM heads?
SAM stands for Seal-A-Matic, a Hunter Industries term for sprinkler bodies with built-in check valves. The spring-loaded mechanism inside prevents water from draining out through the head when the system is off. They’re considered essential for any zone with elevation changes, and irrigation professionals on Reddit forums consistently list them as a baseline requirement for slopes.
How much water do check valves save on slopes?
According to the Irrigation Association, check valves can reduce water waste by up to 20% per zone in sloped or uneven areas. The savings come from eliminating the low-head drainage that dumps water out of the lowest heads after every single watering cycle.